Step-by-Step Guide for Adding a Custom Logo to the 360 Tour on iAriv.
Login in to your account
Please take ref. from this blog: How to Login into your iariv account?
- Access the Tour Edit Option:
- From the Drafts, Published, or Private page.
- Select the three dots on the tour thumbnail, then choose “Edit.”
- Access the Tour Editor:
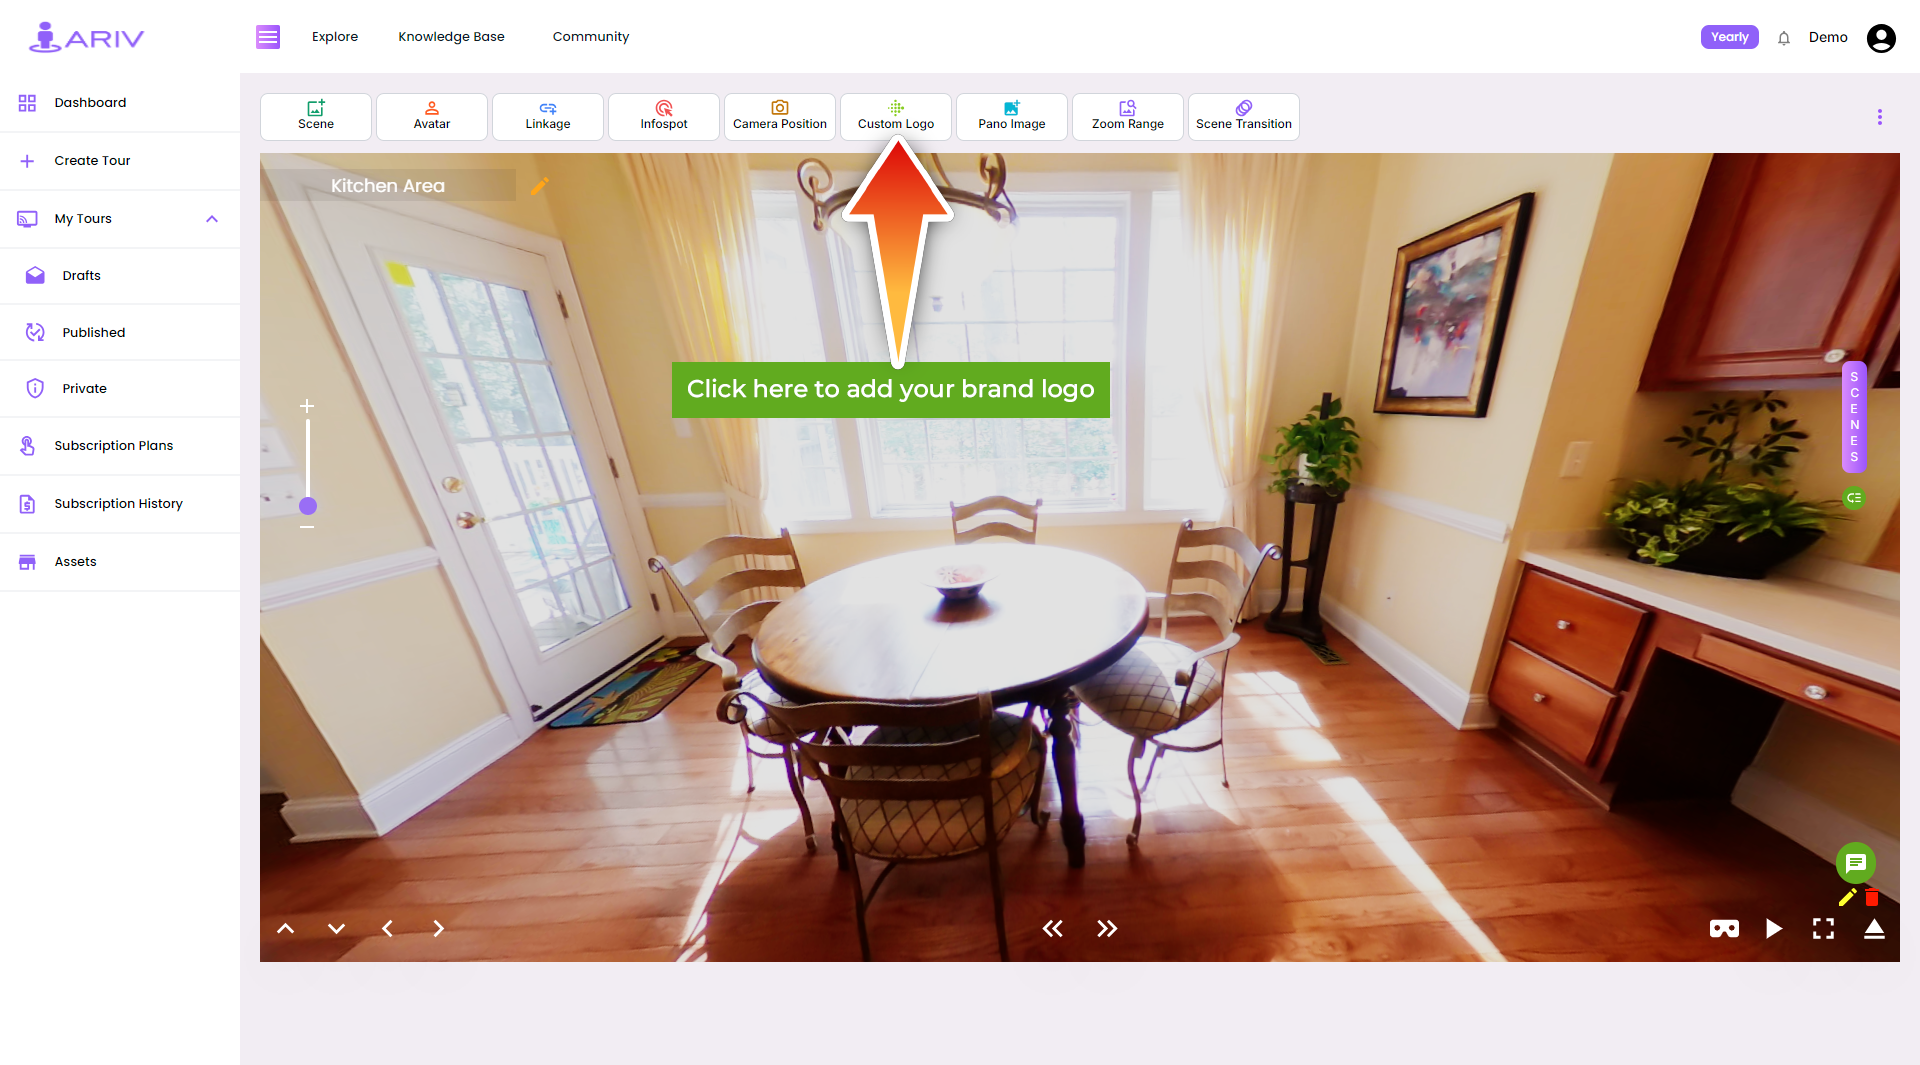
- Open the Custom Logo Feature:
- In the 360 Tour settings, locate “Add Custom Logo.”
- Click on the option to Add Custom Logo.
Custom Logo -
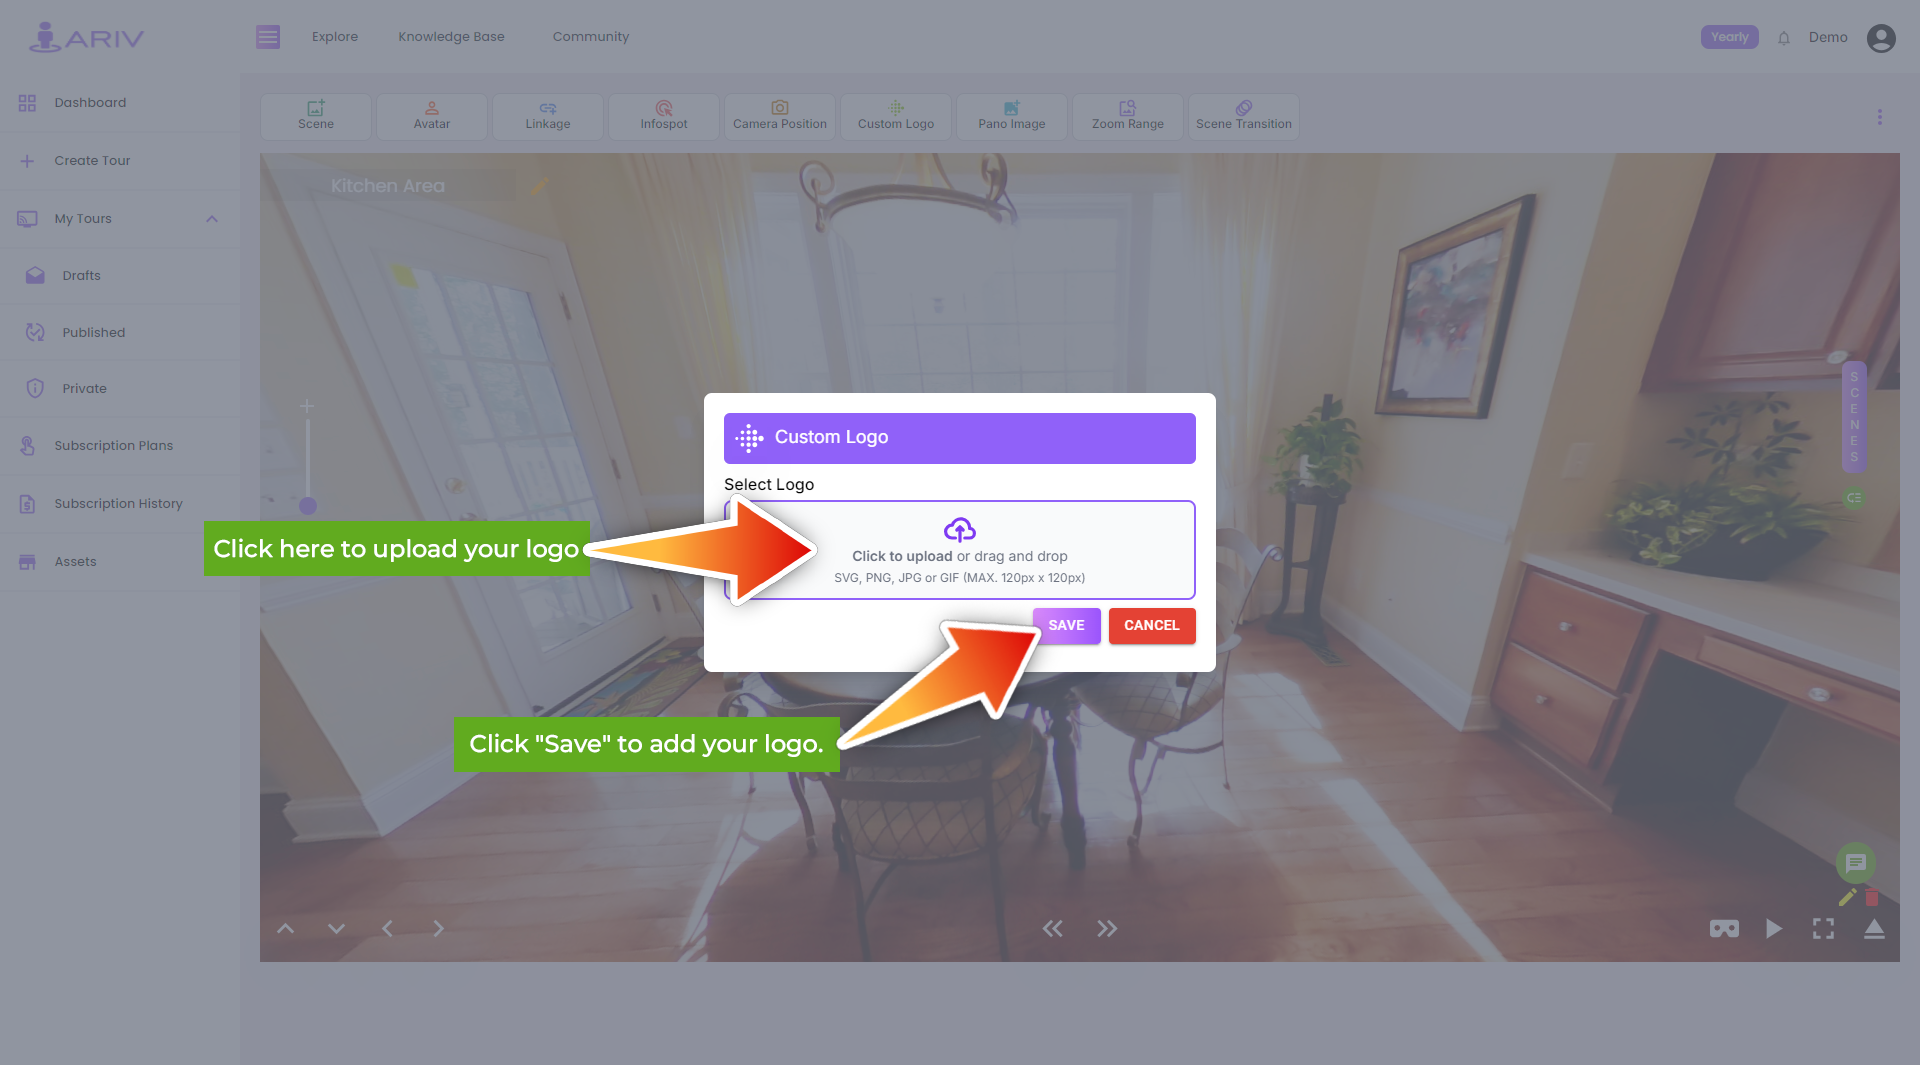
- Upload Your Logo Image:
- Click the “Upload” button or drag and drop the logo on the upload icon.
- A file selection dialog will appear. Browse your computer to find the desired logo image.
- Select the logo image file and click “Open.”
- Upload Your Logo Image:
Upload Custom Logo - Preview the Logo:
-
- After selecting the file, the logo image will appear below the “Select Logo” box.
- Verify that the correct logo has been uploaded and is displayed properly.
- Save the Custom Logo:
-
- Once you are satisfied with the uploaded logo, click the “Save” button.
- This action will finalize the addition of your custom logo to the 360 Tour.
- Confirm the Logo Placement:
-
- The custom logo will be positioned at the top right corner of your 360 Tour scene.
- Review the tour to ensure the logo appears as expected.
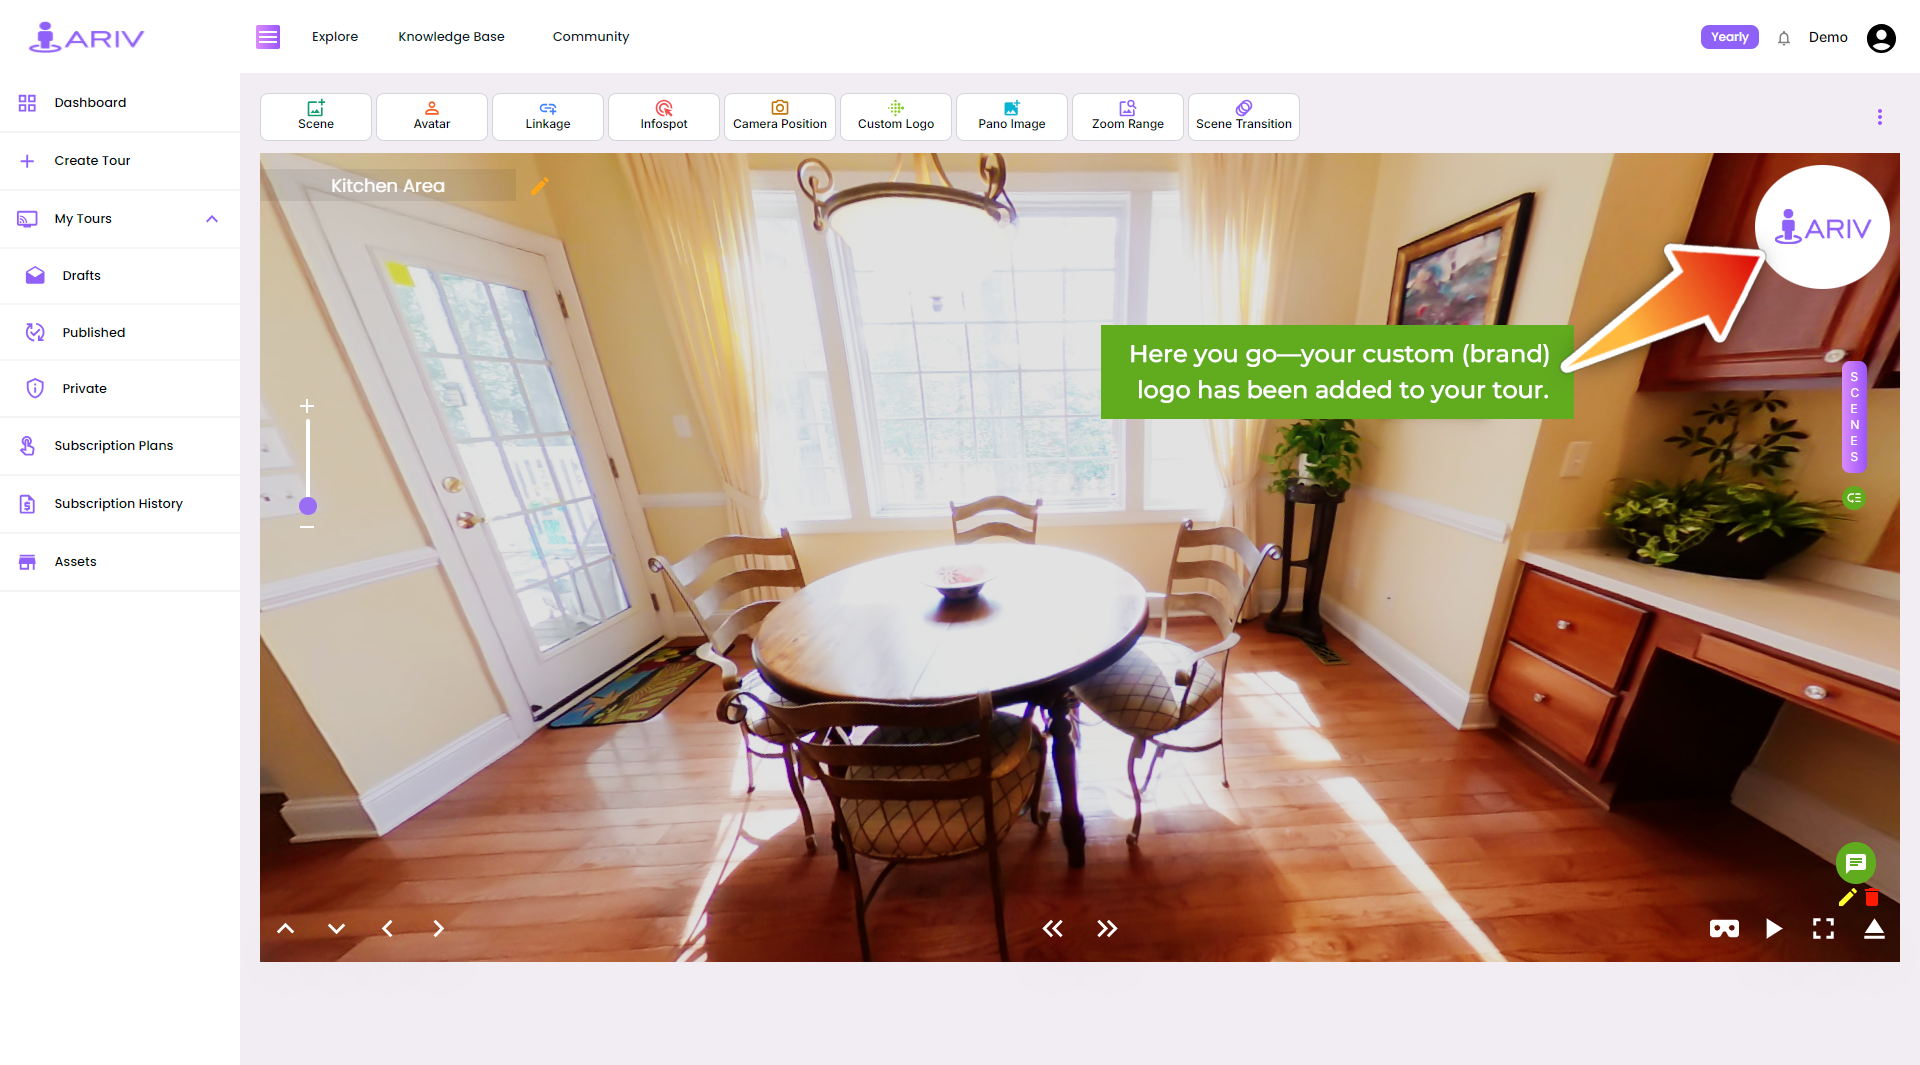
Custom Logo Added By following these steps, you can successfully add a custom logo to your 360 Tour scene on iAriv, enhancing your branding and professional presentation.