Infospot
An infospot is an interactive element within a virtual tour designed to provide users with additional information through various media formats. When users click on an infospot, it can display a video or photo accompanied by a text description, offering a deeper understanding or context about a specific point of interest. Furthermore, infospots can include hyperlinks that direct users to external websites, enabling them to access further information, related content, or additional resources. This feature enriches the virtual tour experience by delivering comprehensive and engaging content right within the tour itself.
Step-by-Step Guide for Adding Image or Video Infospot to a 360 Tour on iAriv
Infospot in a 360 Tour allow you to enhance viewer engagement by adding interactive elements like images or videos to specific scenes. Follow these steps to add Infospots on iAriv:
Step 1: Access the Scene Editor
- Action: Open the scene where you want to add an Infospot.
- Instructions: Navigate to the scene editing interface in iAriv.

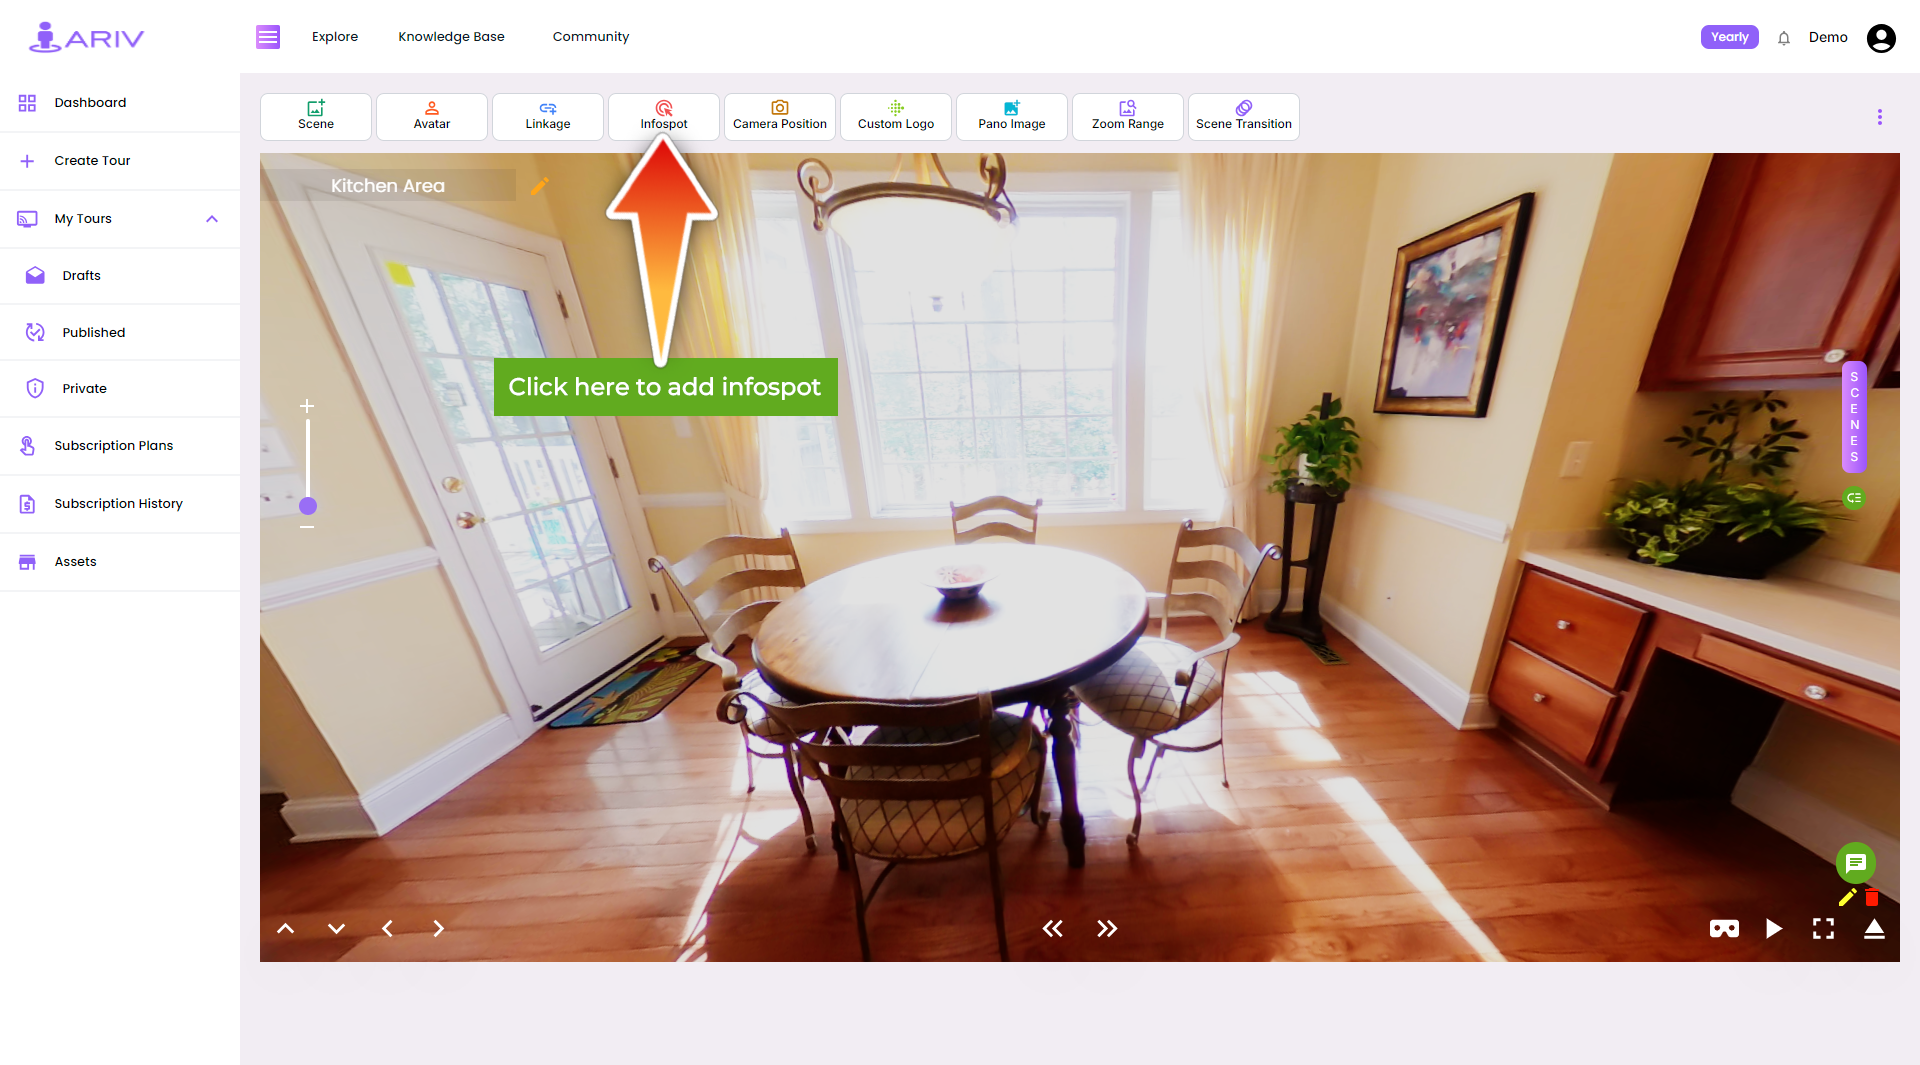
Step 2: Click on “Add Infospot”
- Action: Initiate the Infospot addition process.
- Instructions: Look for the “Add Infospot” option on the top bar just above the scene image.
- Details: Click on this option to begin placing an Infospot in your scene.

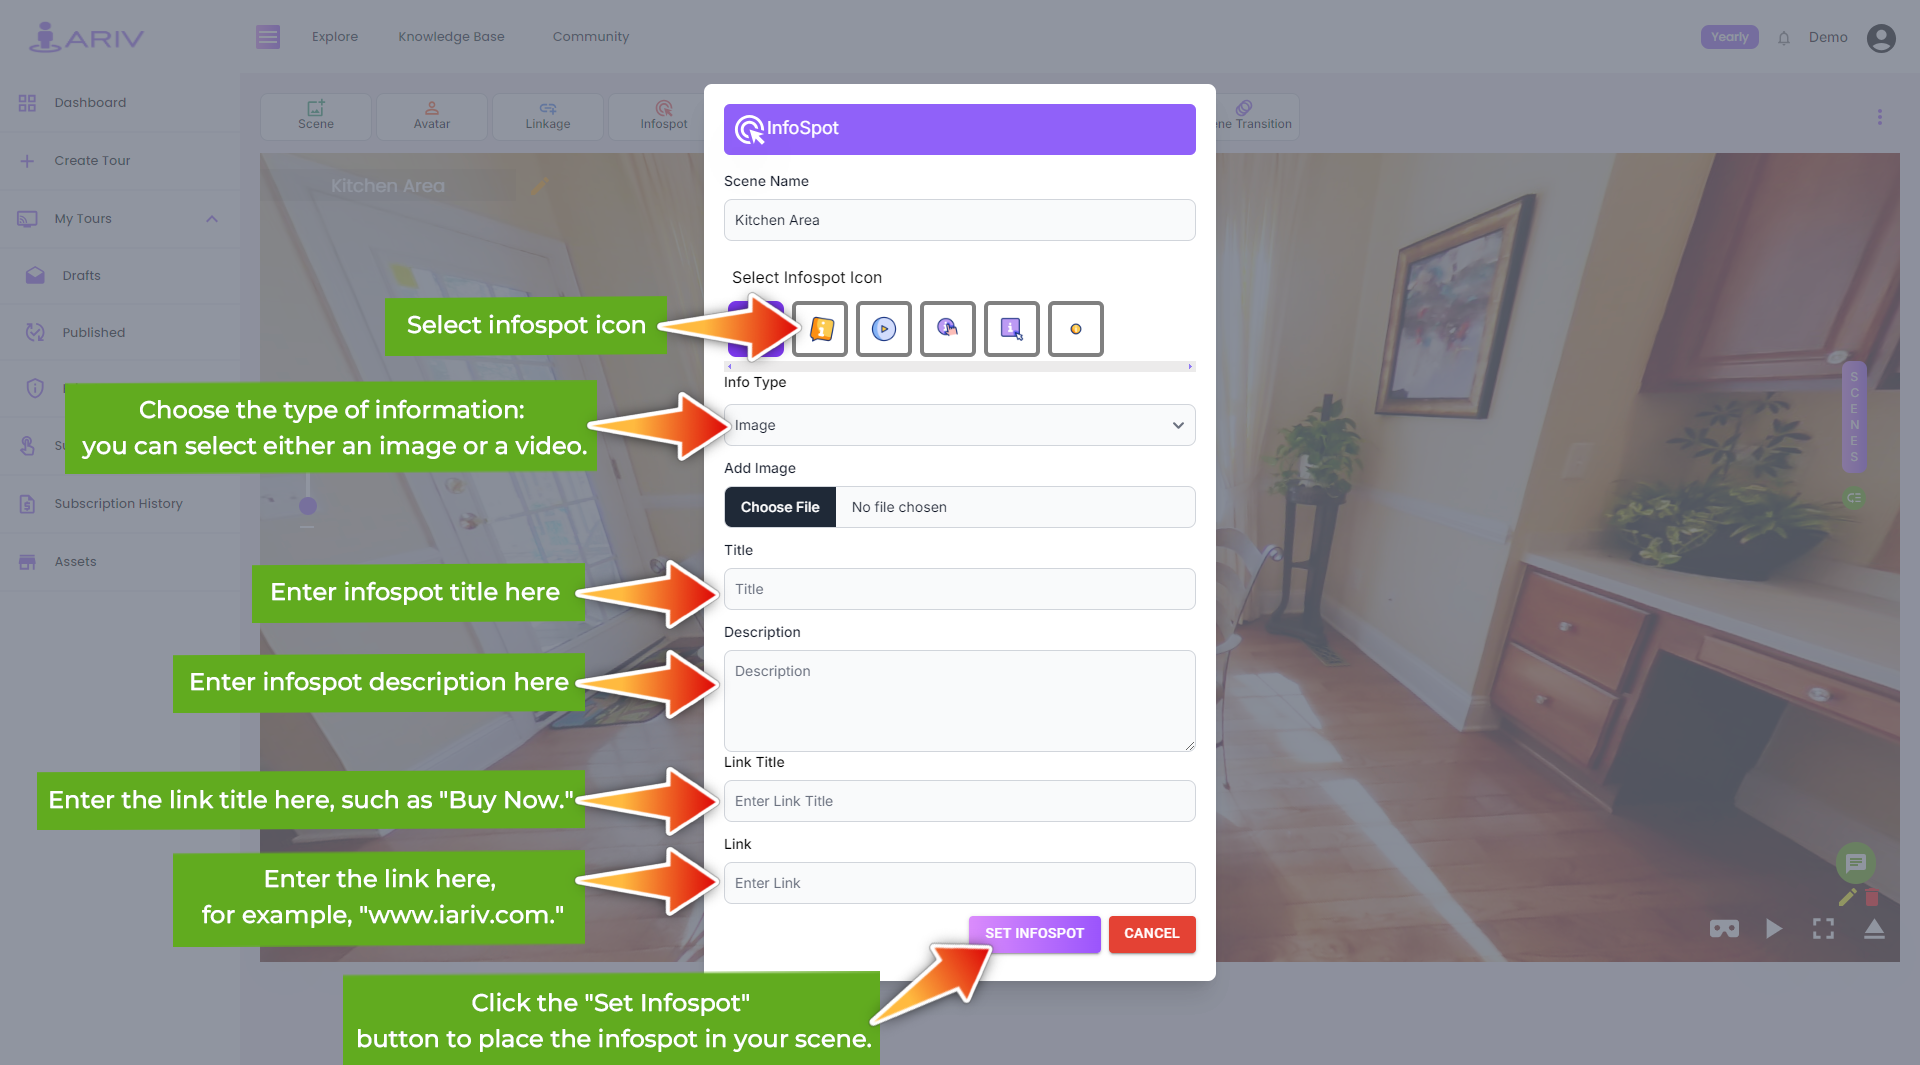
Step 3: Enter Infospot Details
- Action: Provide information for the Infospot.
- Instructions: After Clicking on the Add Infospot option, a popup window will appear.
- Details: Enter the following details:
- Scene Name: The scene name will appear by default for the scene that was selected for adding infospot.
- Select Infospot Icon: Select the icon that you want to show in the scene for accessing the information.
- Info Type: Select either “Image” or “Video” depending on the content you want to add.
- After selecting the info type, additional fields will appear for you to enter the relevant details.
- If the Image Type is Selected
- Add Image: Choose an image file from your Computer for showing as infospot.
- Title: Provide a title for the Infospot (e.g., “Family Room”).
- Description: Write a description to explain the content of the Infospot.
- Link Title: For adding a title about the link to which use can navigate using the link.
- Link: For taking the user to a specific link if the infospot is clicked.
- If the Video Type is Selected
-
- Youtube URL: If adding a video, paste the YouTube link or video URL.
- Title: Provide a title for the Infospot.
- Link Title: For adding a title about the link to which use can navigate using the link.
- Link: For taking the user to a specific link if the infospot is clicked.
Step 5: Save the Infospot
- Action: Finalize the Infospot addition.
- Instructions: Click on the “Set Infospot” button within the popup window.
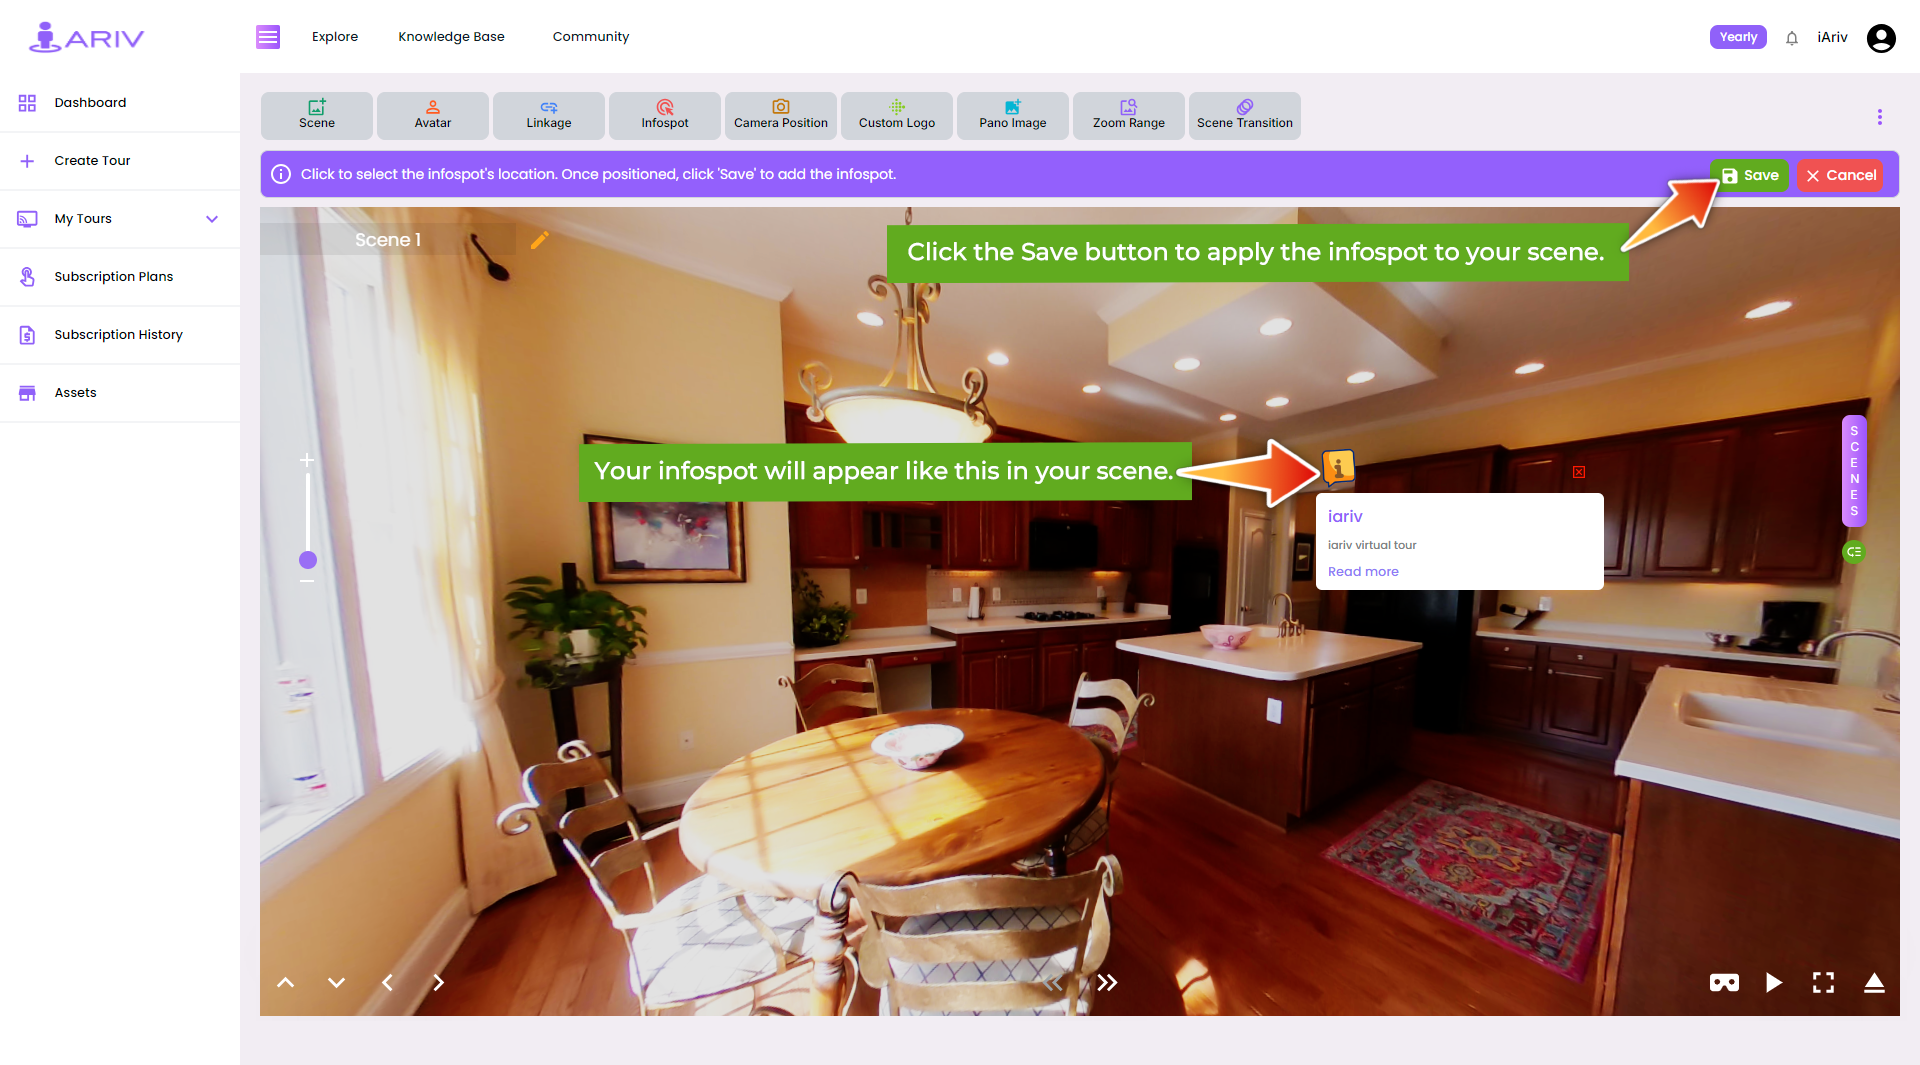
- Outcome: The Infospot with the added image or video will be created and displayed in the scene.
Step 6: Preview and Adjust (if needed)
- Action: Review the scene with the Infospot.
- Instructions: Preview the scene to ensure the Infospot appears as intended.
- Details: Make any adjustments by repeating the steps above if the Infospot placement or content needs refinement.

Step 3: Place the Infospot on the Scene
- Action: Position the Infospot.
- Instructions: Move your mouse cursor to the desired location on the scene where you want to place the Infospot.
- Details: Click and release the mouse button to set the position of the Infospot.
By following these steps, you can effectively enhance your 360 Tour on iAriv by adding interactive Infospots with images or videos, providing more engaging and informative content for your audience. For further assistance or troubleshooting, refer to iAriv’s support resources or contact their customer service team.
