Step-by-Step Guide for Setting Camera Position in a Virtual Tour
Setting the camera position in your Virtual Tour ensures that each scene is displayed as intended, enhancing viewer experience and navigation. Follow these steps to set camera positions on iAriv:
Step 1: Access the Tour Editing Interface
- Action: Open the Tour you want to edit.
- Instructions: Navigate to the Tour editing interface in iAriv where you can adjust settings.
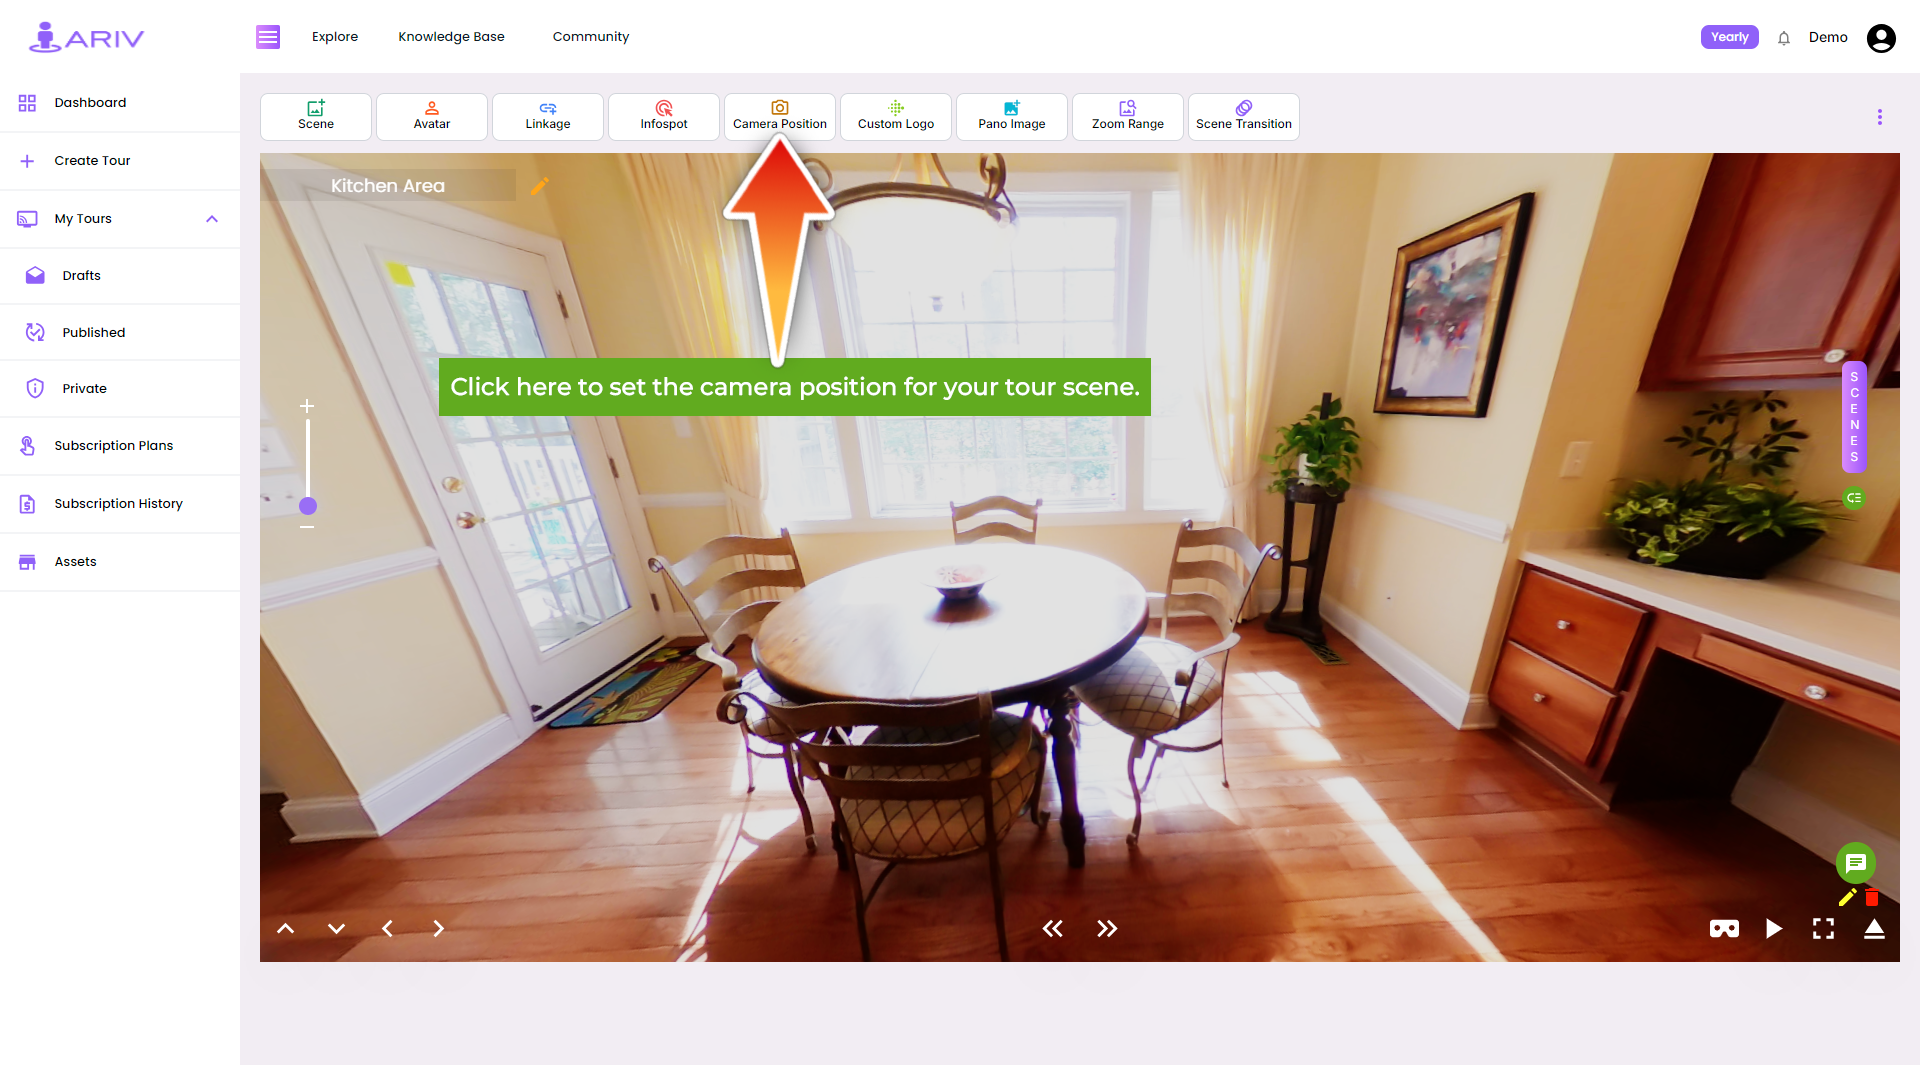
Step 2: Use “Set Camera Position” Feature
- Action: Initiate camera position setting.
- Instructions: Look for the “Set Camera Position” option or link within the editing tools.
- Details: This feature allows you to define the viewpoint from which the scene will be initially viewed.

Step 3: Position the Camera Cursor
- Action: Interact with the scene to adjust the camera viewpoint.
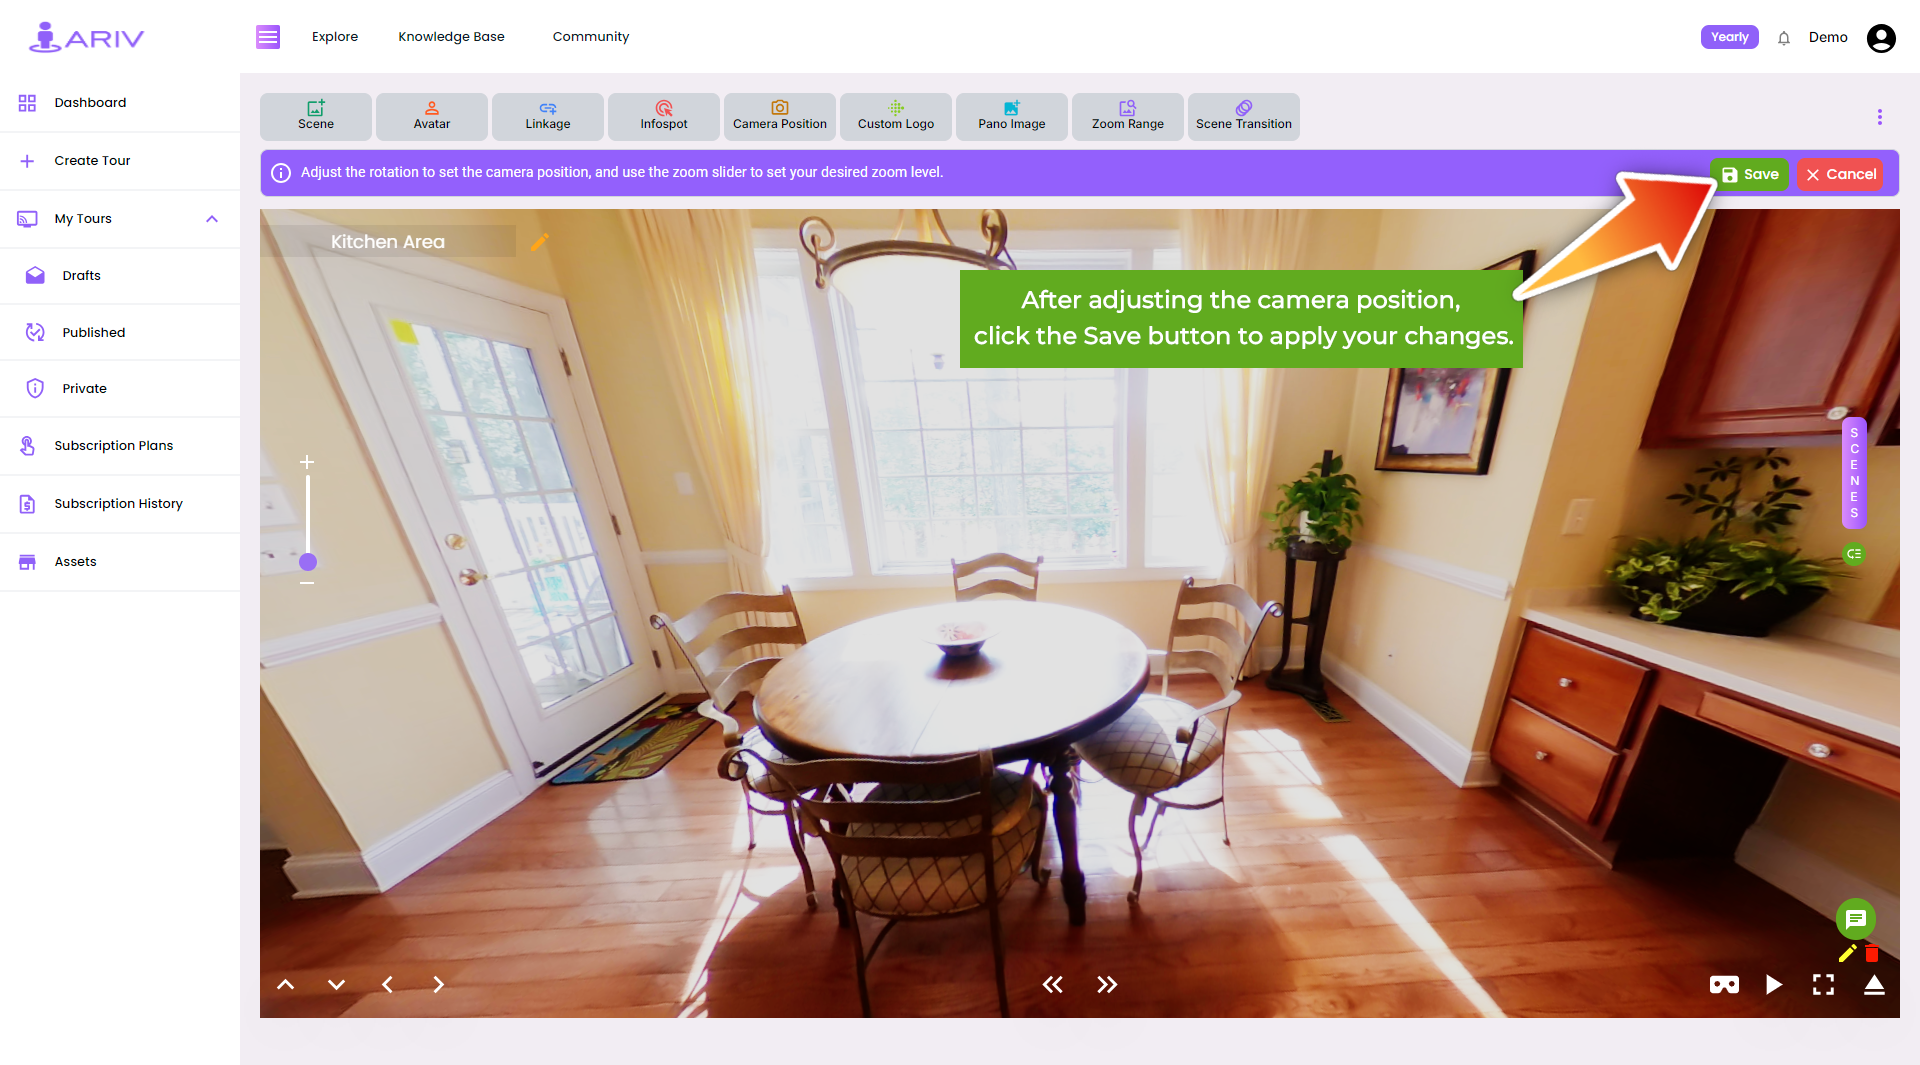
- Instructions: After clicking the “Set Camera Position” link, You can move the scene in required direction using the mouse cursor.
- Details: Position this cursor to the desired viewpoint within the scene by clicking on the spot where you want the initial view to be focused.
Step 4: Save the Camera Position
- Action: Finalize your adjustments.
- Instructions: Click on the “Save” button (usually highlighted in blue) to confirm the set camera position.
- Outcome: The camera position for the particular scene will be saved and applied.

Step 5: Verify and Adjust (if needed)
- Action: Review the scene’s appearance.
- Instructions: Preview the scene to ensure the camera position meets your expectations.
- Details: Make any necessary adjustments by repeating the process if the viewpoint needs refinement.
By following these steps, you can effectively control and optimize the camera positions within your Virtual Tour on iAriv, ensuring each scene is presented in the best possible manner for your audience. If you encounter any issues or have questions, refer to iAriv’s support resources for further assistance.
