The Avatar Chatbot feature in iAriv allows you to enhance your virtual tours with interactive Q&A functionality. By adding a chatbot with an avatar, users can ask questions and receive instant answers about your products or company. This feature is particularly beneficial for real estate owners and confectionery shops, as it provides a personalized and efficient way for users to engage with your offerings.
Follow this step-by-step guide to set up a chatbot with an avatar in your virtual tour.
Step-by-Step Guide to Creating an Avatar Chatbot

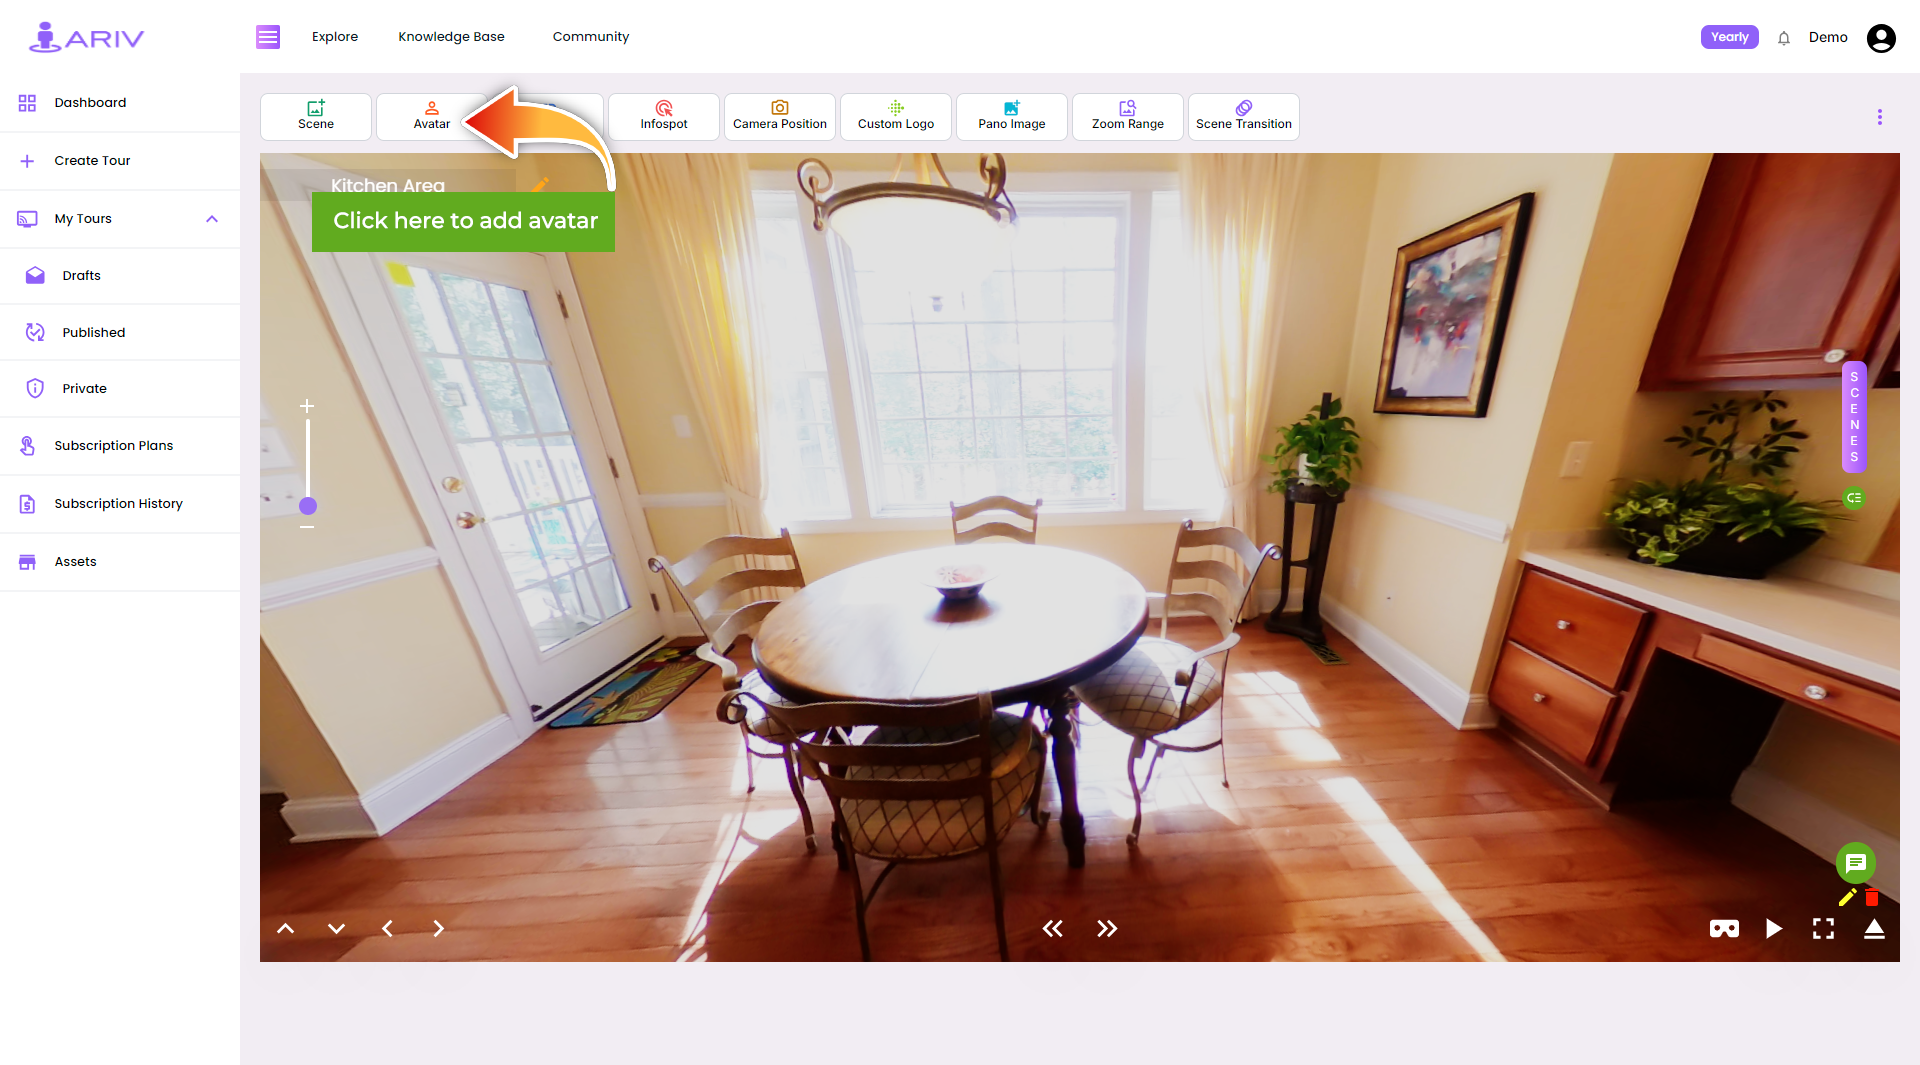
Step 1: Access the Avatar Section
- Navigate to Dashboard: Once logged in, go to the dashboard.
- Select Avatar: Click on the Avatar option from the menu.

Step 2: Set Up Avatar with Chatbot
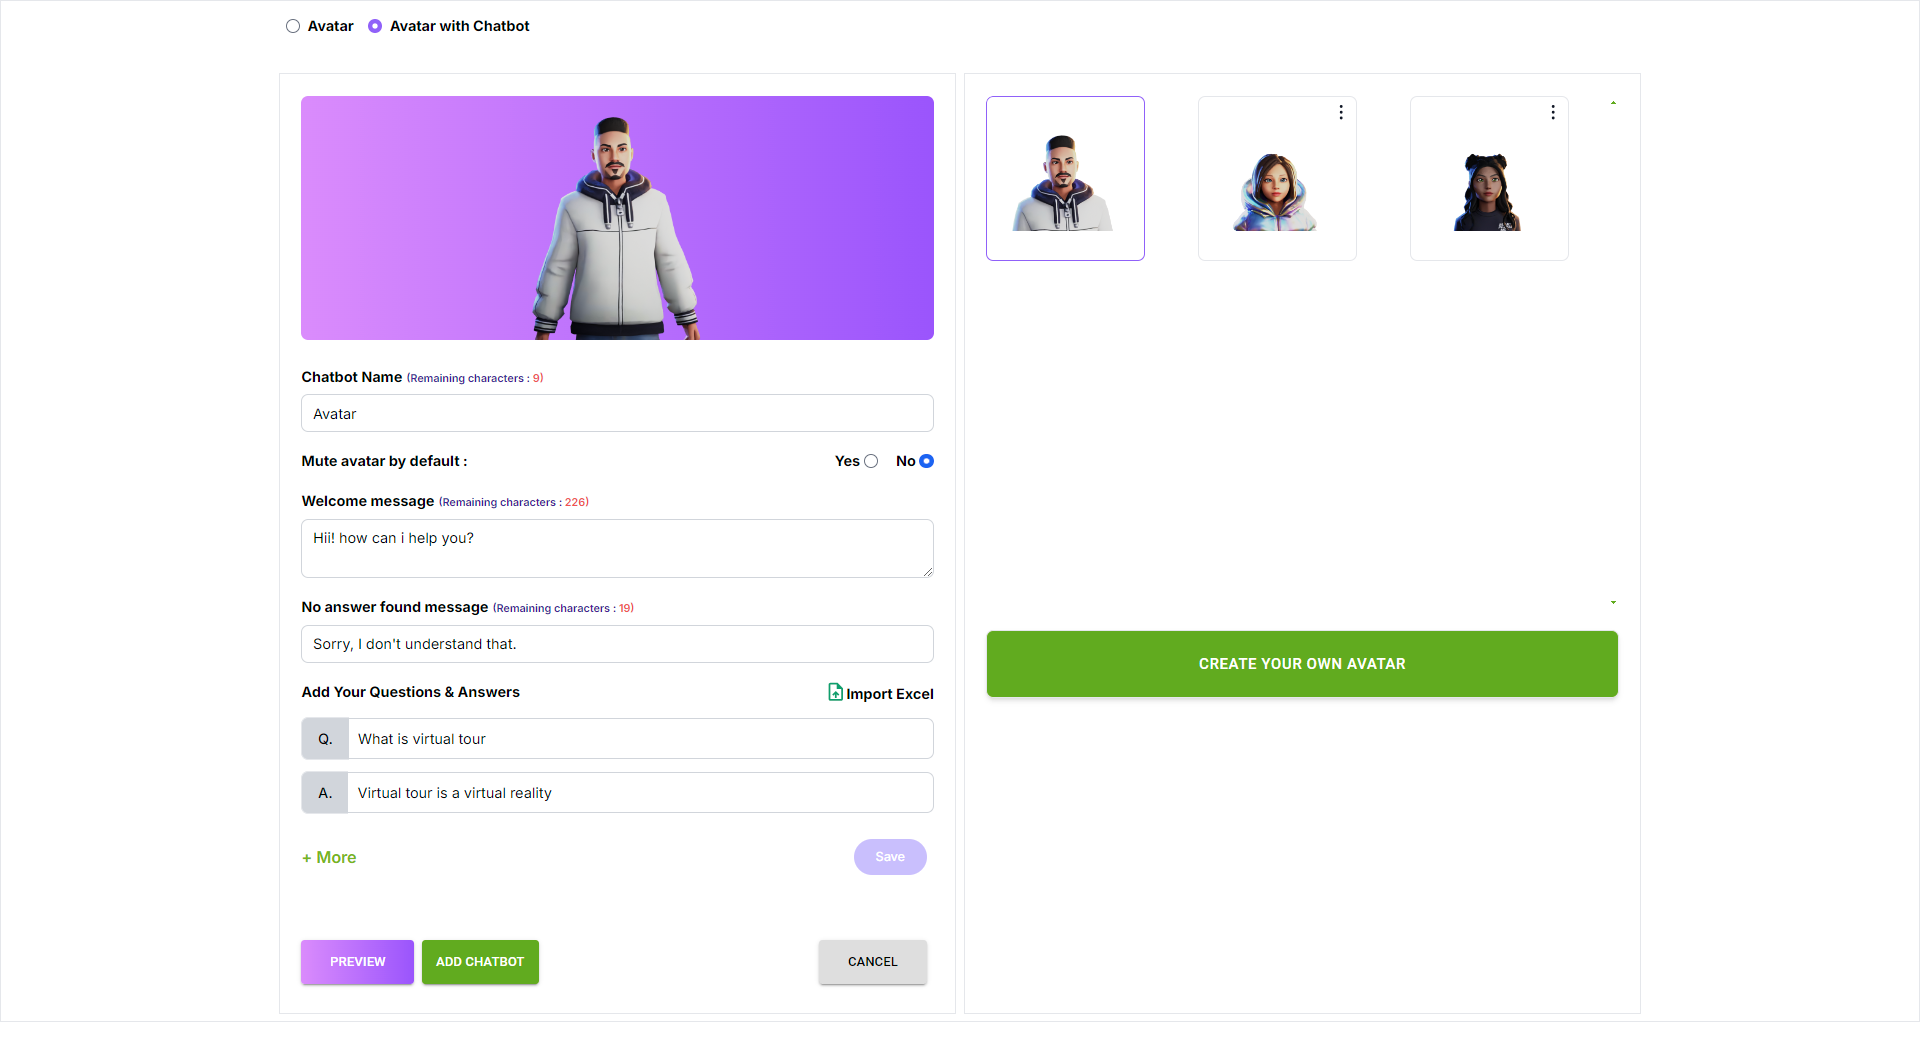
- Choose Avatar with Chatbot: At the top of the Avatar section, click on Avatar with Chatbot.
- Enable Feature: A pop-up will appear; click Yes to proceed.
Step 3: Choose Your Avatar
- Select Avatar: Browse and select your preferred avatar from the list on the right side of the window.
Step 4: Customize Your Avatar Chatbot
- Configure Chatbot Details: On the left side of the window, you can:
- You can add a customized name for your chatbot (Maximum 15 characters).
- You can add a customized welcome message for your users (Maximum 250 characters).
Step 5: Add Questions and Answers
- Enter Questions: On the left side of the window, input questions related to your products or services.
- Save Questions: Once you have entered the questions, click the SAVE button to store them.
Step 6: Preview Your Avatar Chatbot
- Preview Functionality: Click the Preview button below to see how your customized avatar and chatbot will appear and function in the virtual tour.
Step 7: Add Chatbot to Virtual Tour
- Finalize Setup: Click on the Add Chatbot button to save your Avatar Chatbot and integrate it into your virtual tour.
