Step-by-Step Guide for Adding Scenes to a 360 Tour on iAriv
Adding scenes to your 360 Tour allows you to create a comprehensive and immersive experience. Follow these steps to add scenes to your 360 Tour:
Step 1: Open the 360 Tour Scene Page
- Action: Access the page where you can manage your tour scenes.
- Instructions: Navigate to the 360 Tour Scene Page from your dashboard.
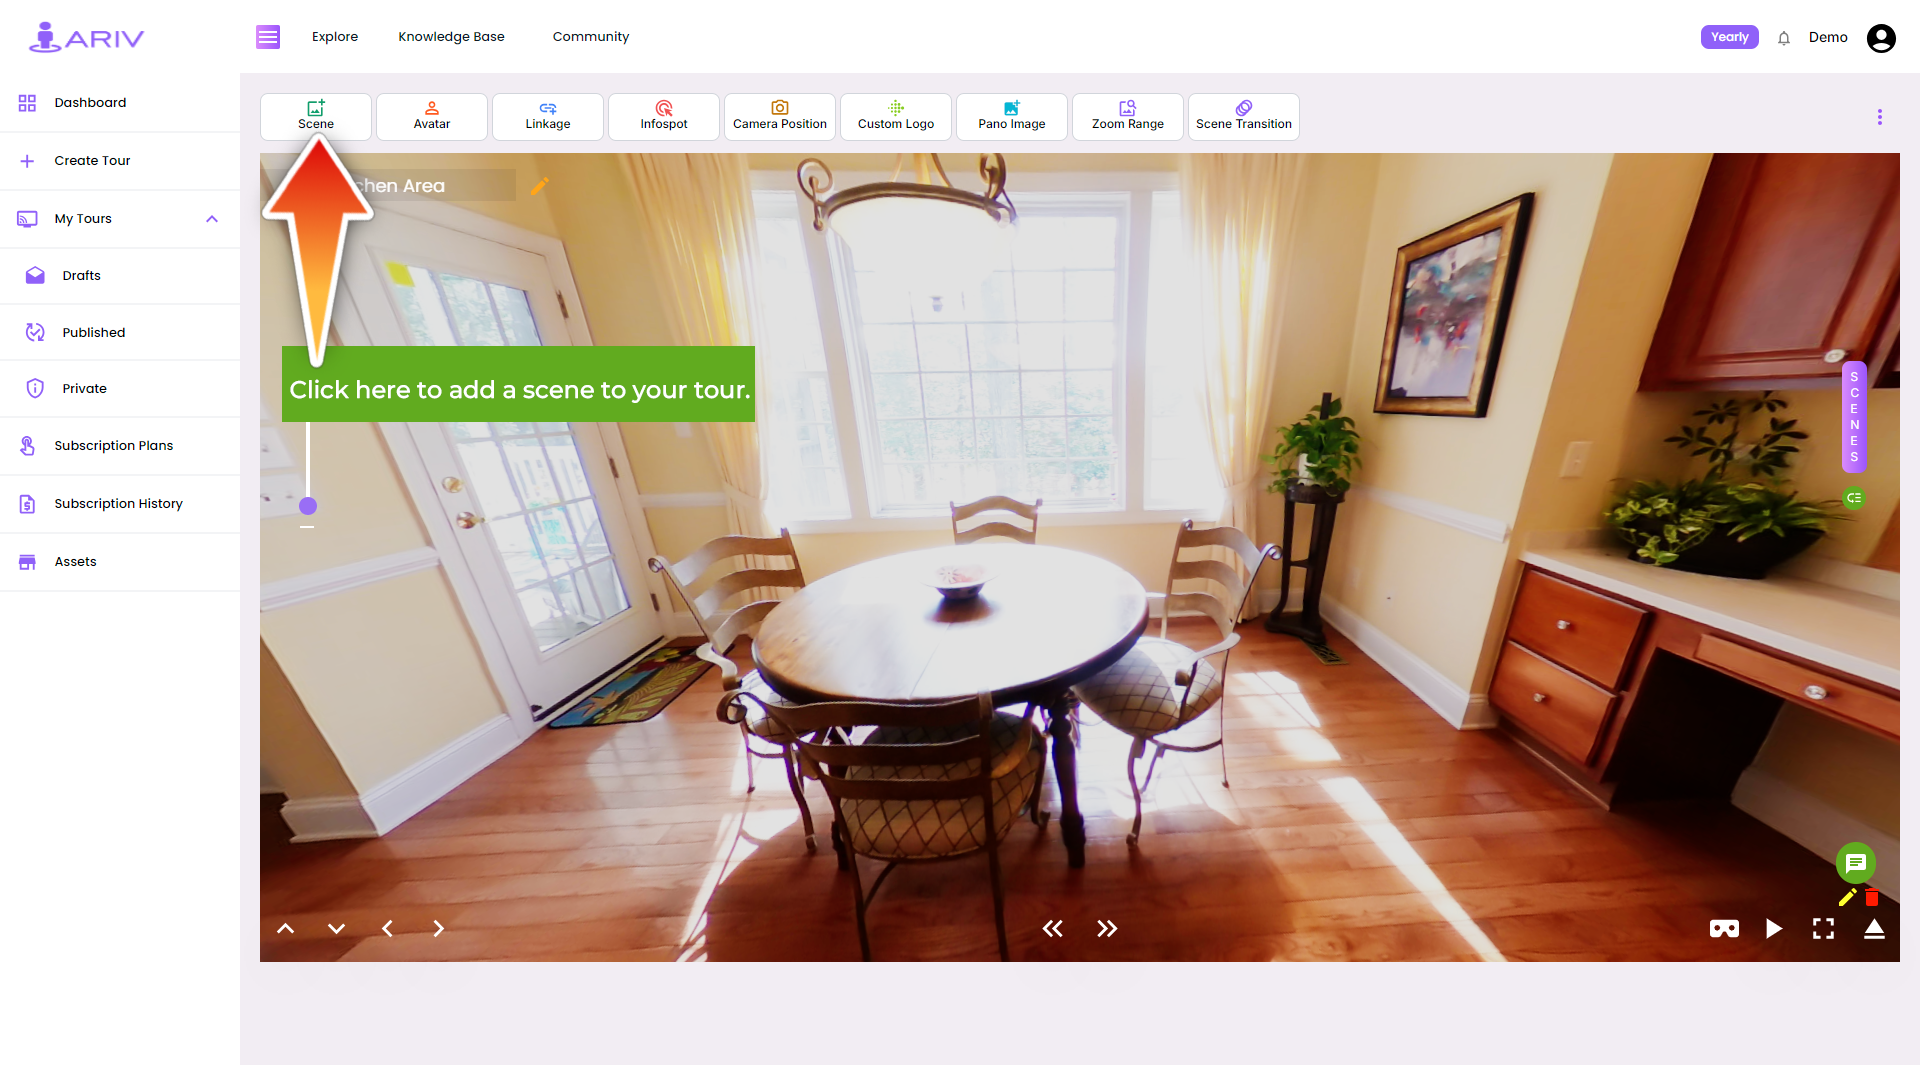
Step 2: Click on the Add Scene Button
- Action: Initiate the process of adding new scenes.
- Instructions: Click on the “Add Scene” button.
Step 3: Open the Add Scene Box
- Action: Open the interface to upload your scenes.
- Outcome: This will open the Add Scene box where you can select your images.
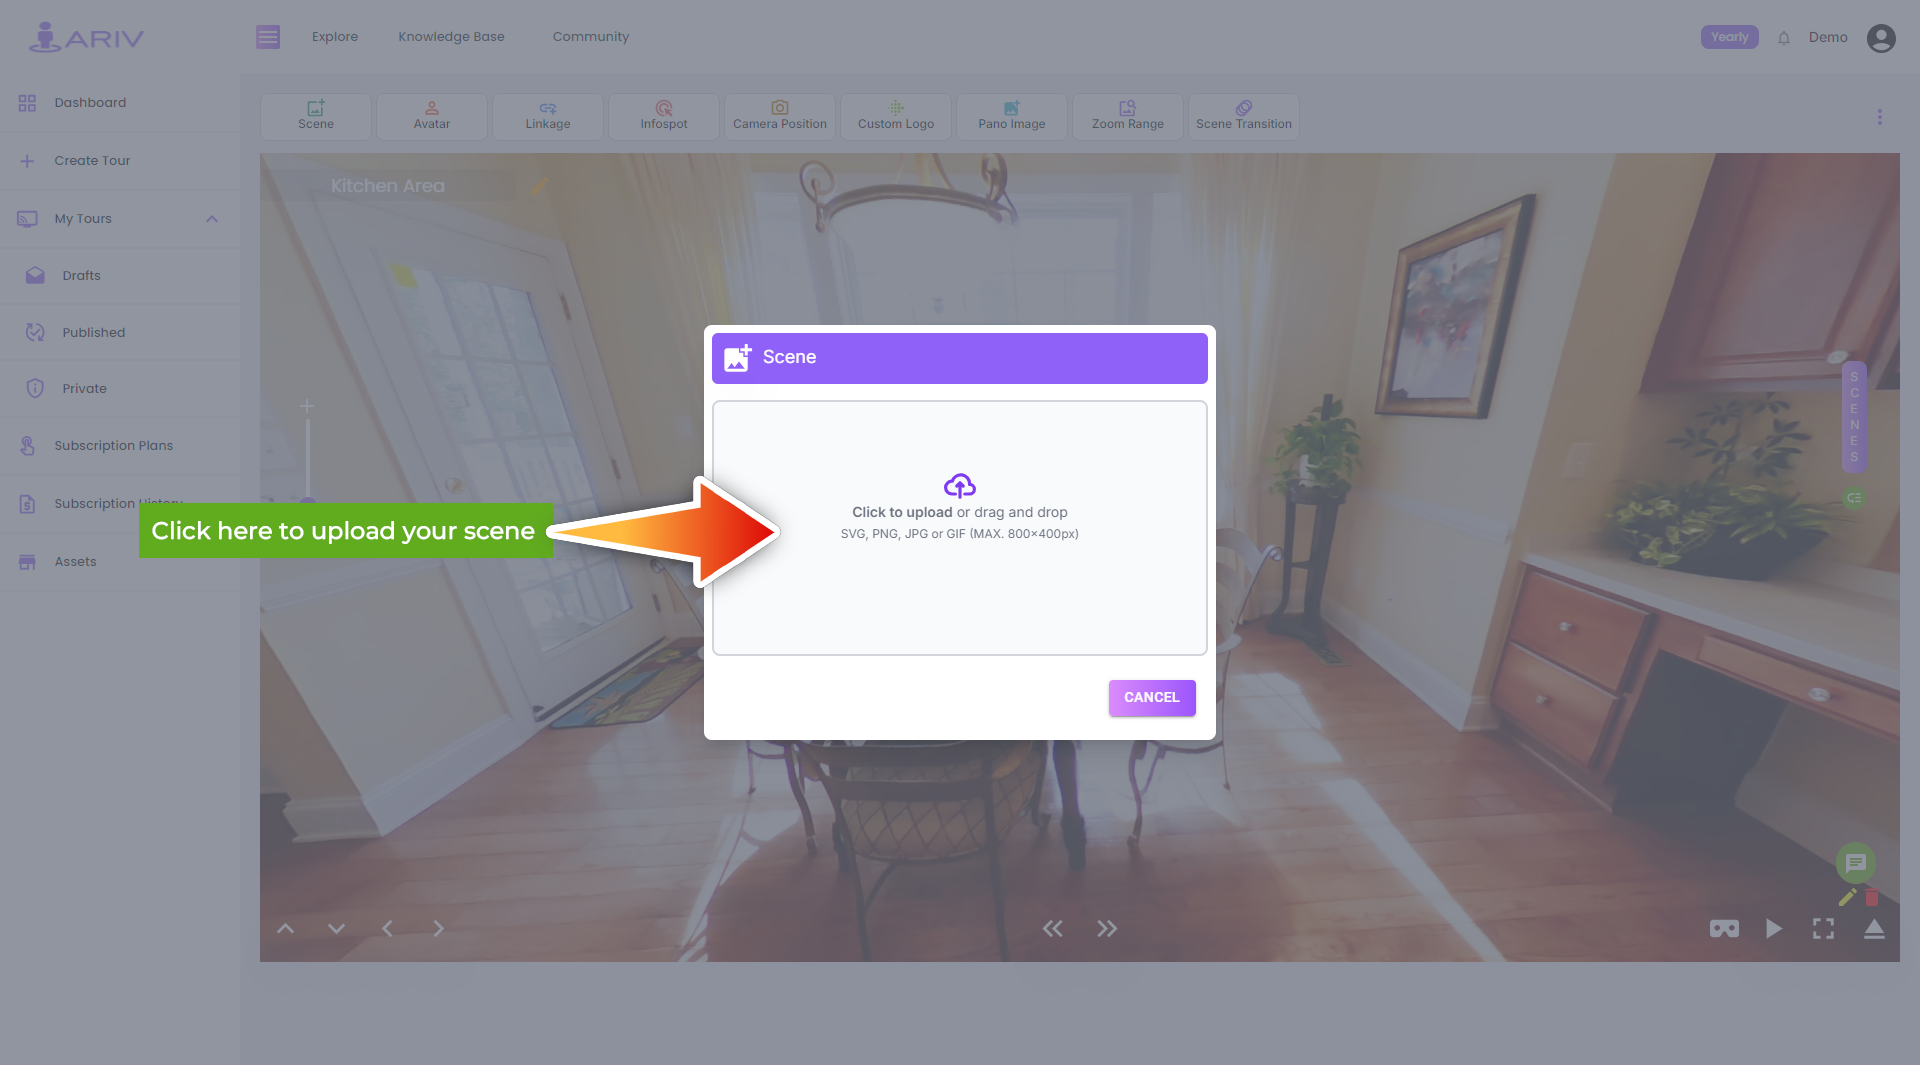
Step 4: Choose 360 Photos to Upload
- Action: Select the 360-degree photos for your tour.
- Instructions: Click on the upload symbol within the Add Scene box.
- Details:
- Minimum Images: You can choose at least 1 image.
- Maximum Images: You can choose up to 5 images to 25 images depending on your Subscription Plan.
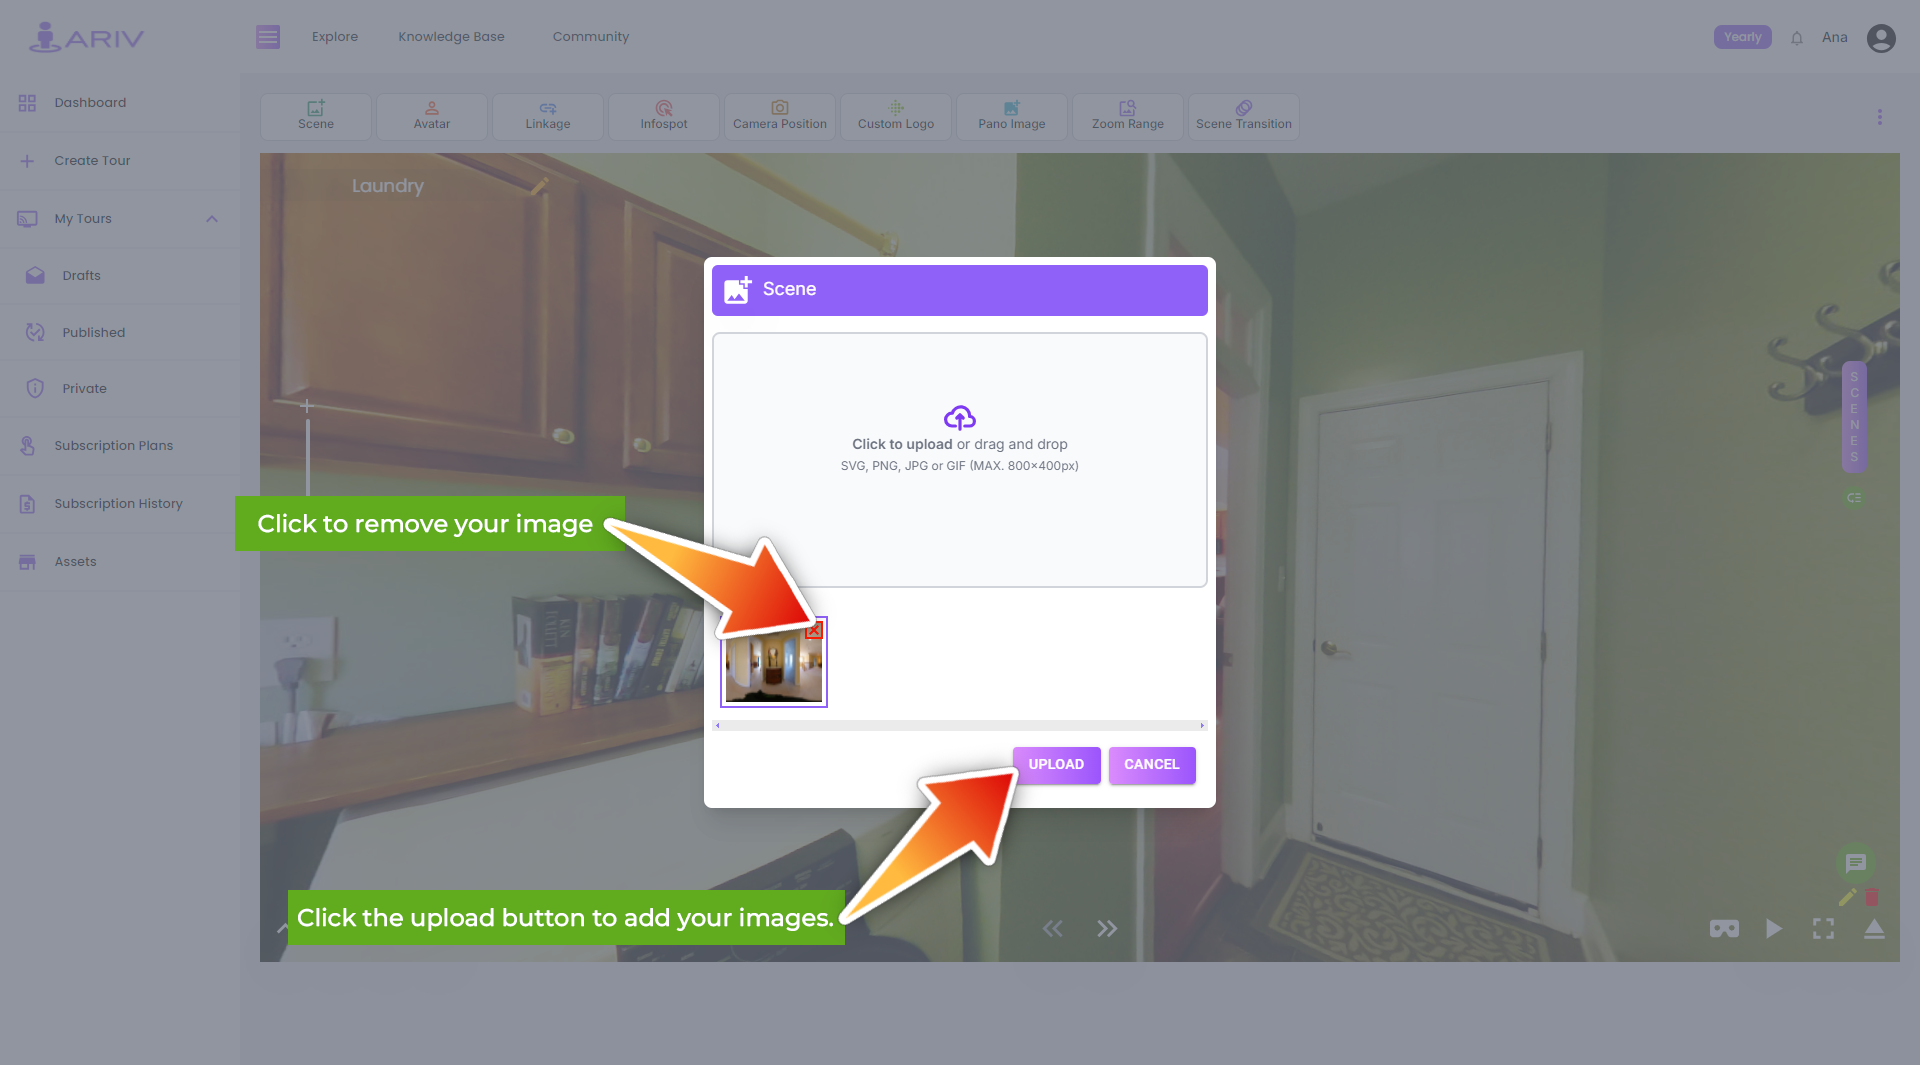
Step 5: Upload the Selected Photos
- Action: Begin the upload process.
- Instructions: After selecting the desired 360 photos, click on the “Upload” button.
- Outcome: The images will start uploading to be used as scenes in your tour.
Step 6: Confirm Upload Success
- Action: Verify that the scenes have been added successfully.
- Outcome: You will receive a message confirming, ” The scenes have been uploaded successfully.”
By following these steps, you can easily add new scenes to your 360 Tour on iAriv, enhancing the overall tour experience for your viewers. If you encounter any issues or have any questions, please contact our support team for assistance.