Adding scene transitions can enhance the flow and user experience of your virtual tour by providing smooth transitions between different scenes. Follow this guide to add scene transitions to your tour
Step-by-Step Guide to Adding Scene Transitions
Step 1: Log In to the Website
- Open iAriv: Launch your web browser and go to the iAriv website.
- Enter Credentials: Log in using your username and password. How to Login into your iariv account?
Step 2: Access the Tour Editor Panel
- Go to Tour Editor: On your dashboard, navigate to the Tour Editor Panel to edit your
tour.
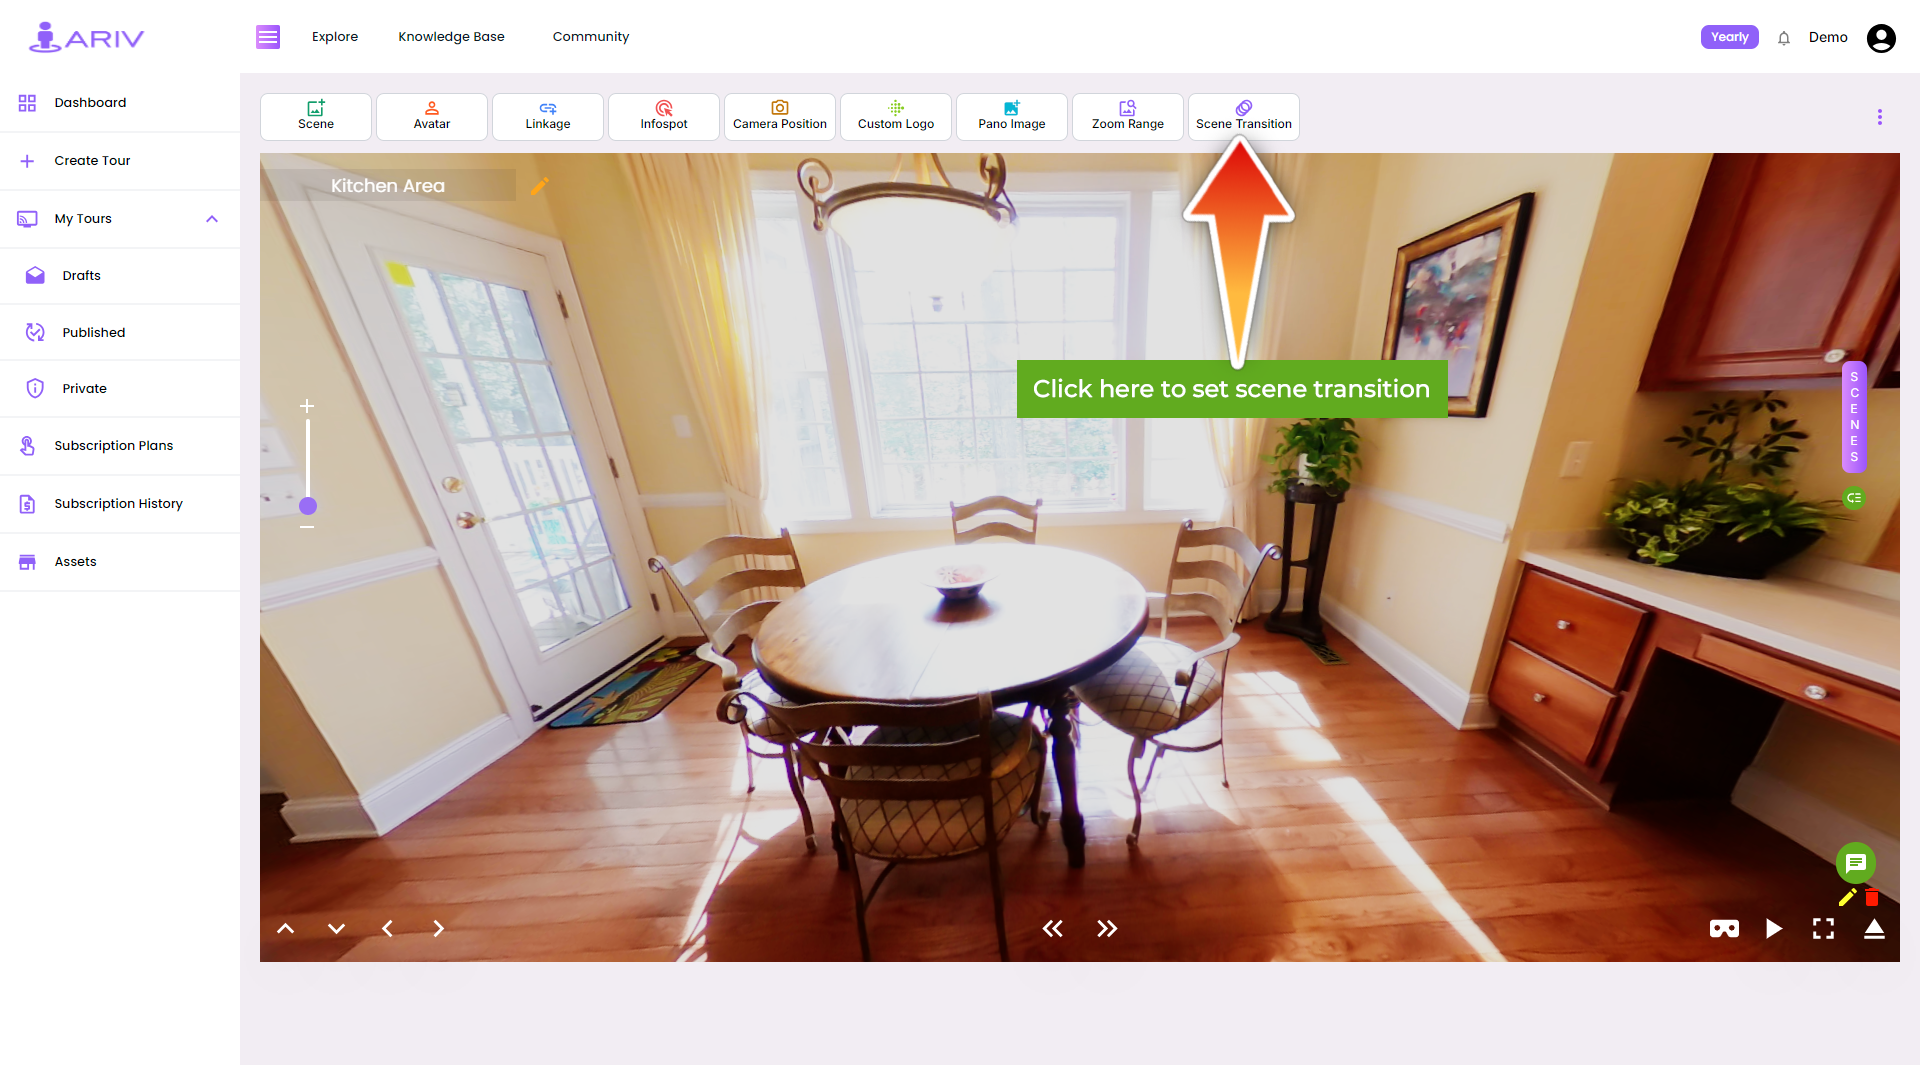
Step 3: Add Scene Transitions
- Select Draft Tour: In the draft tour, click on the Scene Transition option.
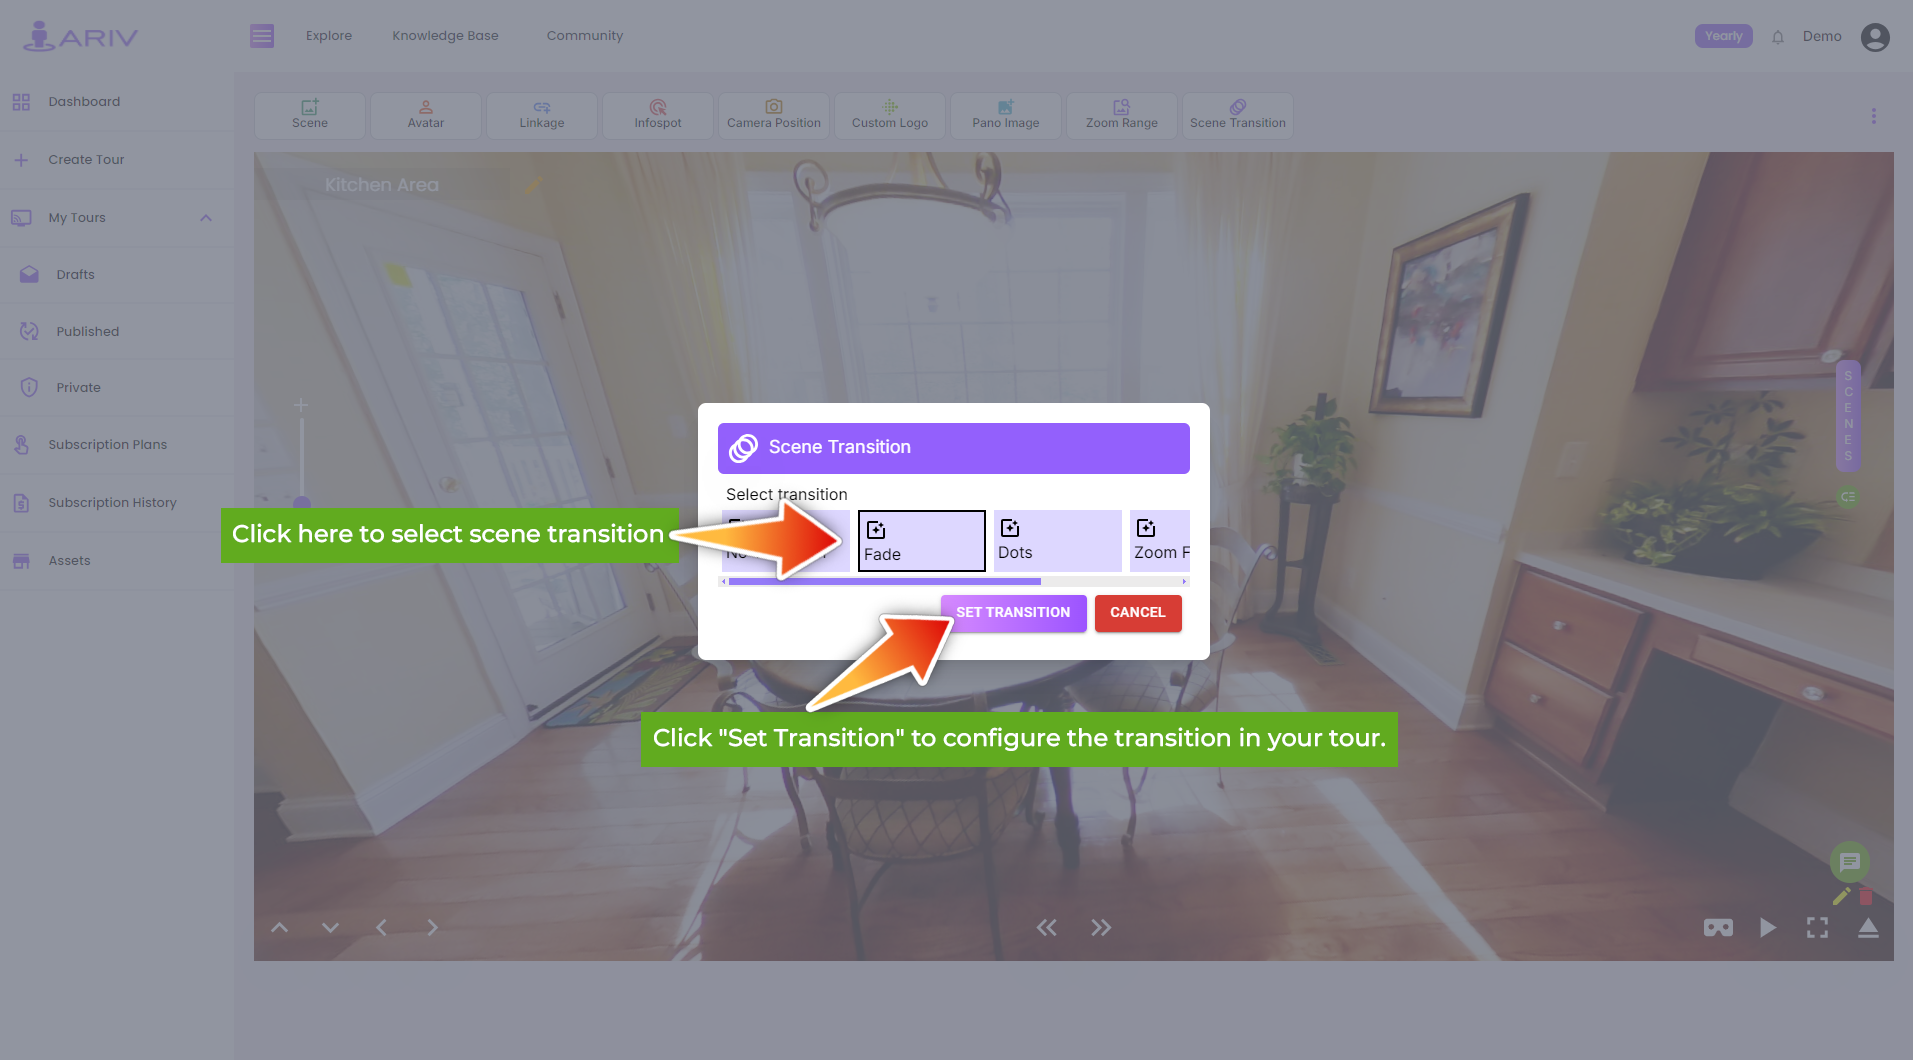
- Choose Transition: A pop-up will appear with a list of available scene transitions. Select the desired transition from the list.
- Save Transition: Click on the Save button to apply the selected transition to your tour.
Note: You can add scene transitions if you have created a new tour
By following these steps, you can easily add scene transitions to your virtual tour, enhancing the overall user experience. If you need further assistance, please reach out to our support team.