Linkage is a pivotal feature within virtual tours, facilitating seamless navigation from one scene to another. By incorporating linkage, users can effortlessly transition between different areas or viewpoints within the virtual environment, enhancing the overall immersive experience. This intuitive functionality ensures smooth exploration, allowing users to navigate the tour easily and fluently. Whether it’s exploring different rooms in a property, moving between outdoor spaces, or transitioning between key points of interest in a museum, linkage serves as a guiding mechanism, ensuring that users can explore every aspect of the virtual tour with convenience and clarity.
Step-by-Step Guide for Adding Linkage to a 360 Tour on iAriv
Adding linkage to your 360 Tour on iAriv allows users to seamlessly navigate between different scenes. Follow these steps to add linkage to your 360 Tour:
Step 1: Log in to Your iAriv Account
- Action: Access your iAriv account.
- Instructions: Use your login credentials to sign in.
Step 2: Open the Tour Editor
- Action: Navigate to the tour you want to edit.
- Instructions: From your dashboard, select the tour you wish to add linkages to and open it in the Tour Editor.
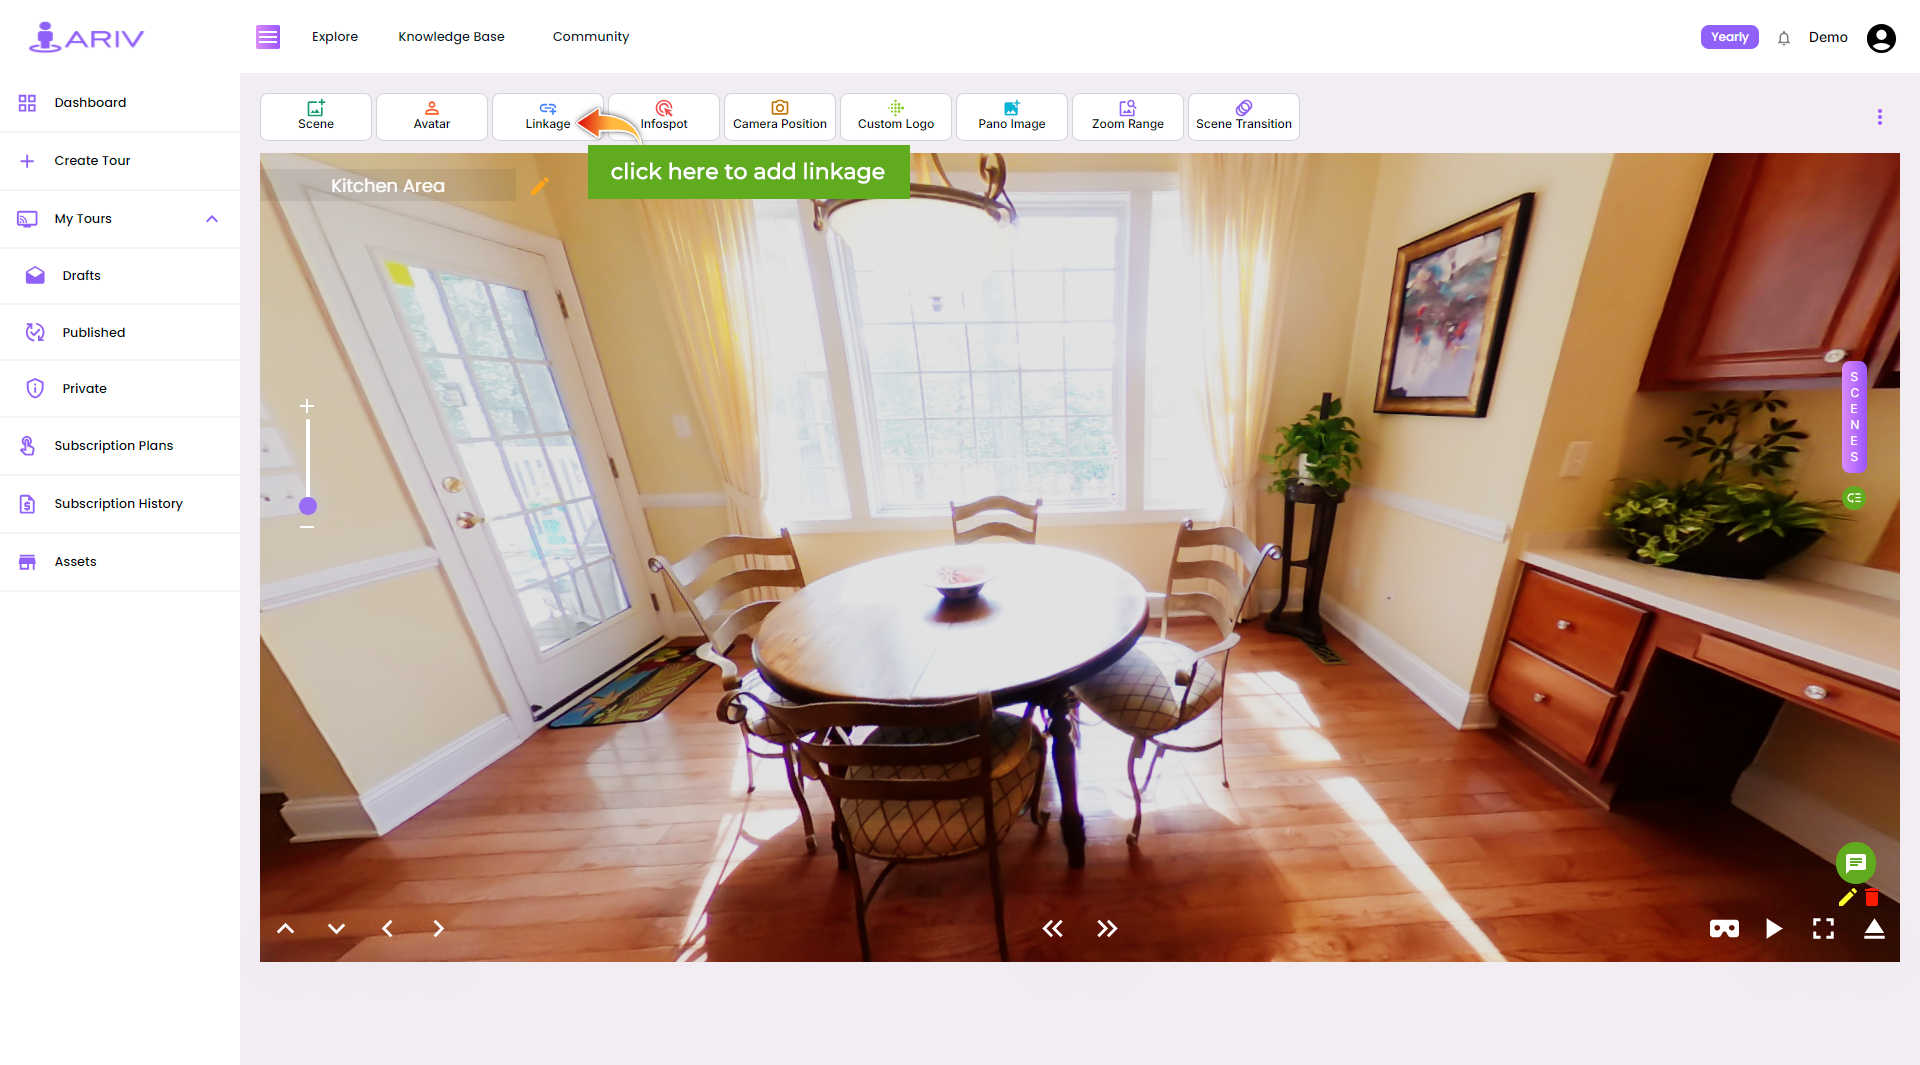
Step 3: Access the Add Linkage Feature
- Action: Find the linkage option in the Tour Editor.
- Instructions: Click on the “Add Linkage” option from the features that appear at the top of the Tour Editor page.
Step 4: Select Link Icon
- Action: Choose the link icon you want to use for Linkage.
- Instructions: Select the link icon from the given icons that you think is most suitable for your Tour.
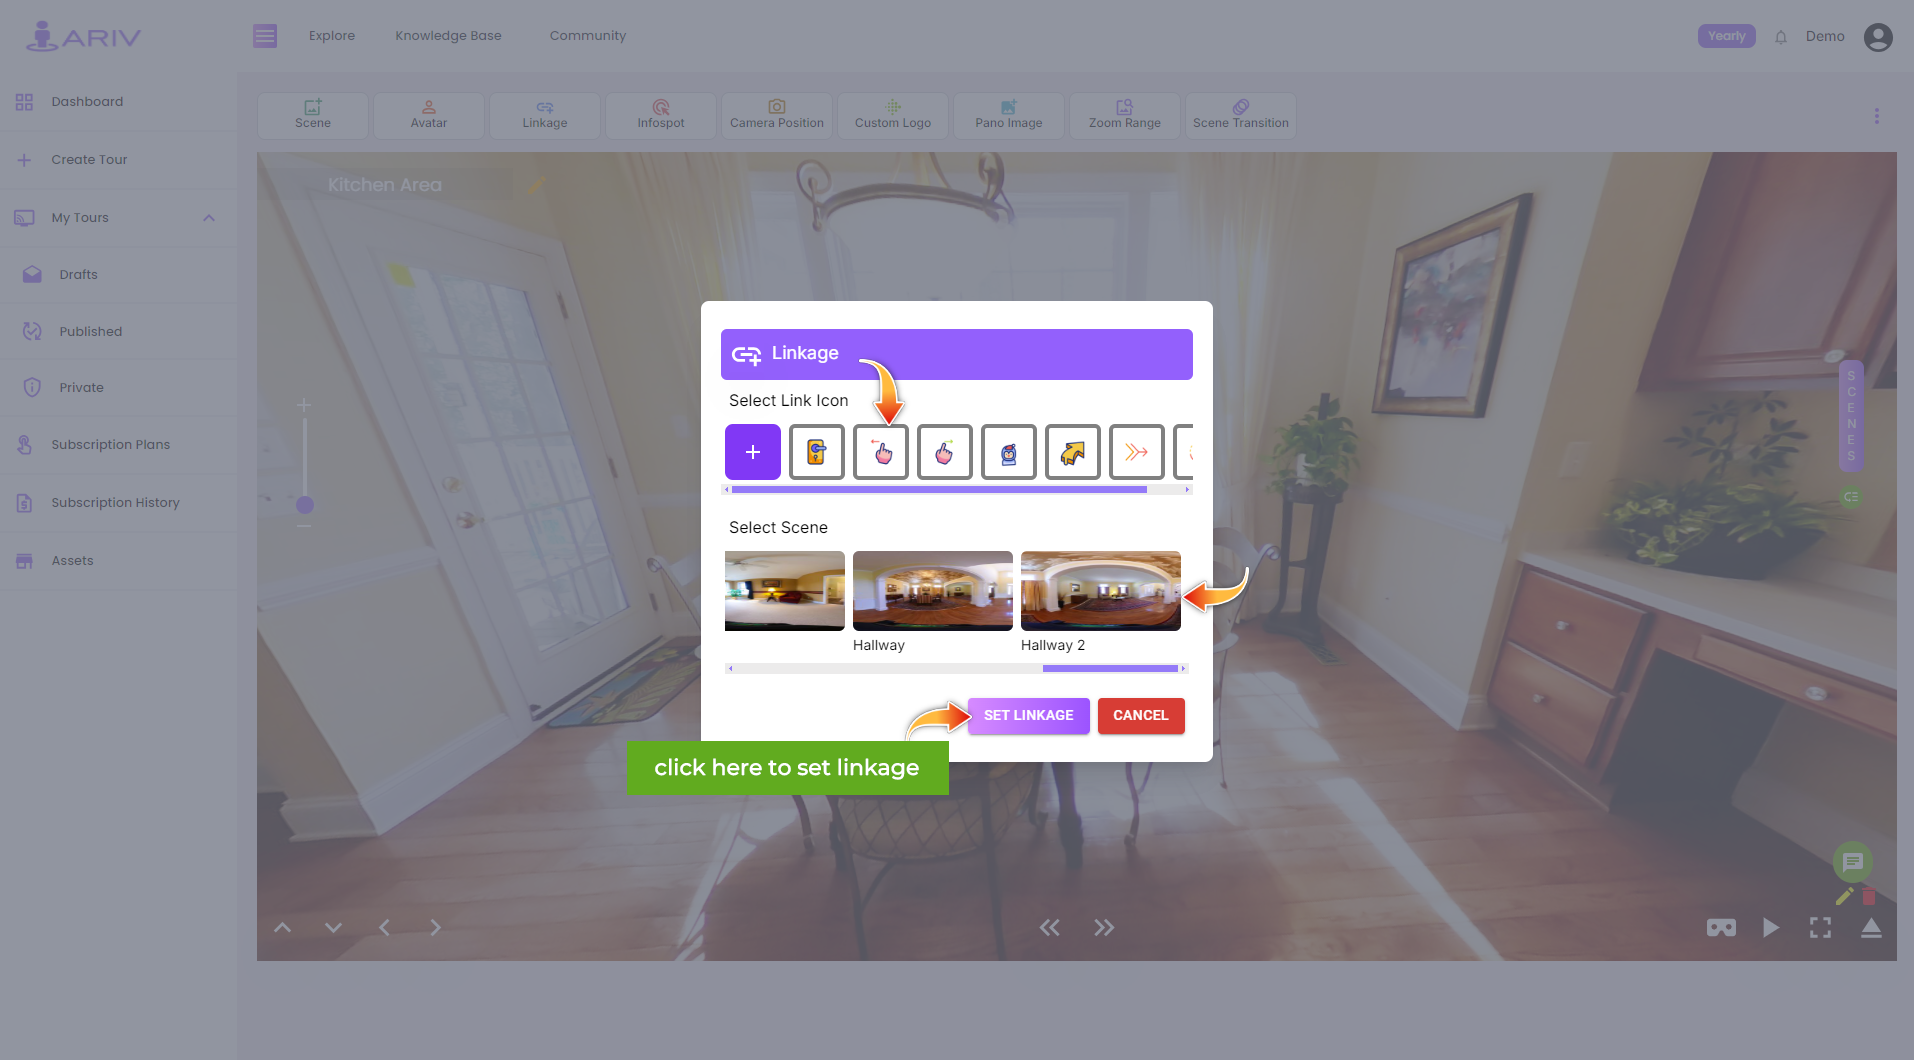
Step 5: Choose the Destination Scene
- Action: Link to the desired destination scene.
- Instructions: Select the scene to which you want to link from the list of available scenes.
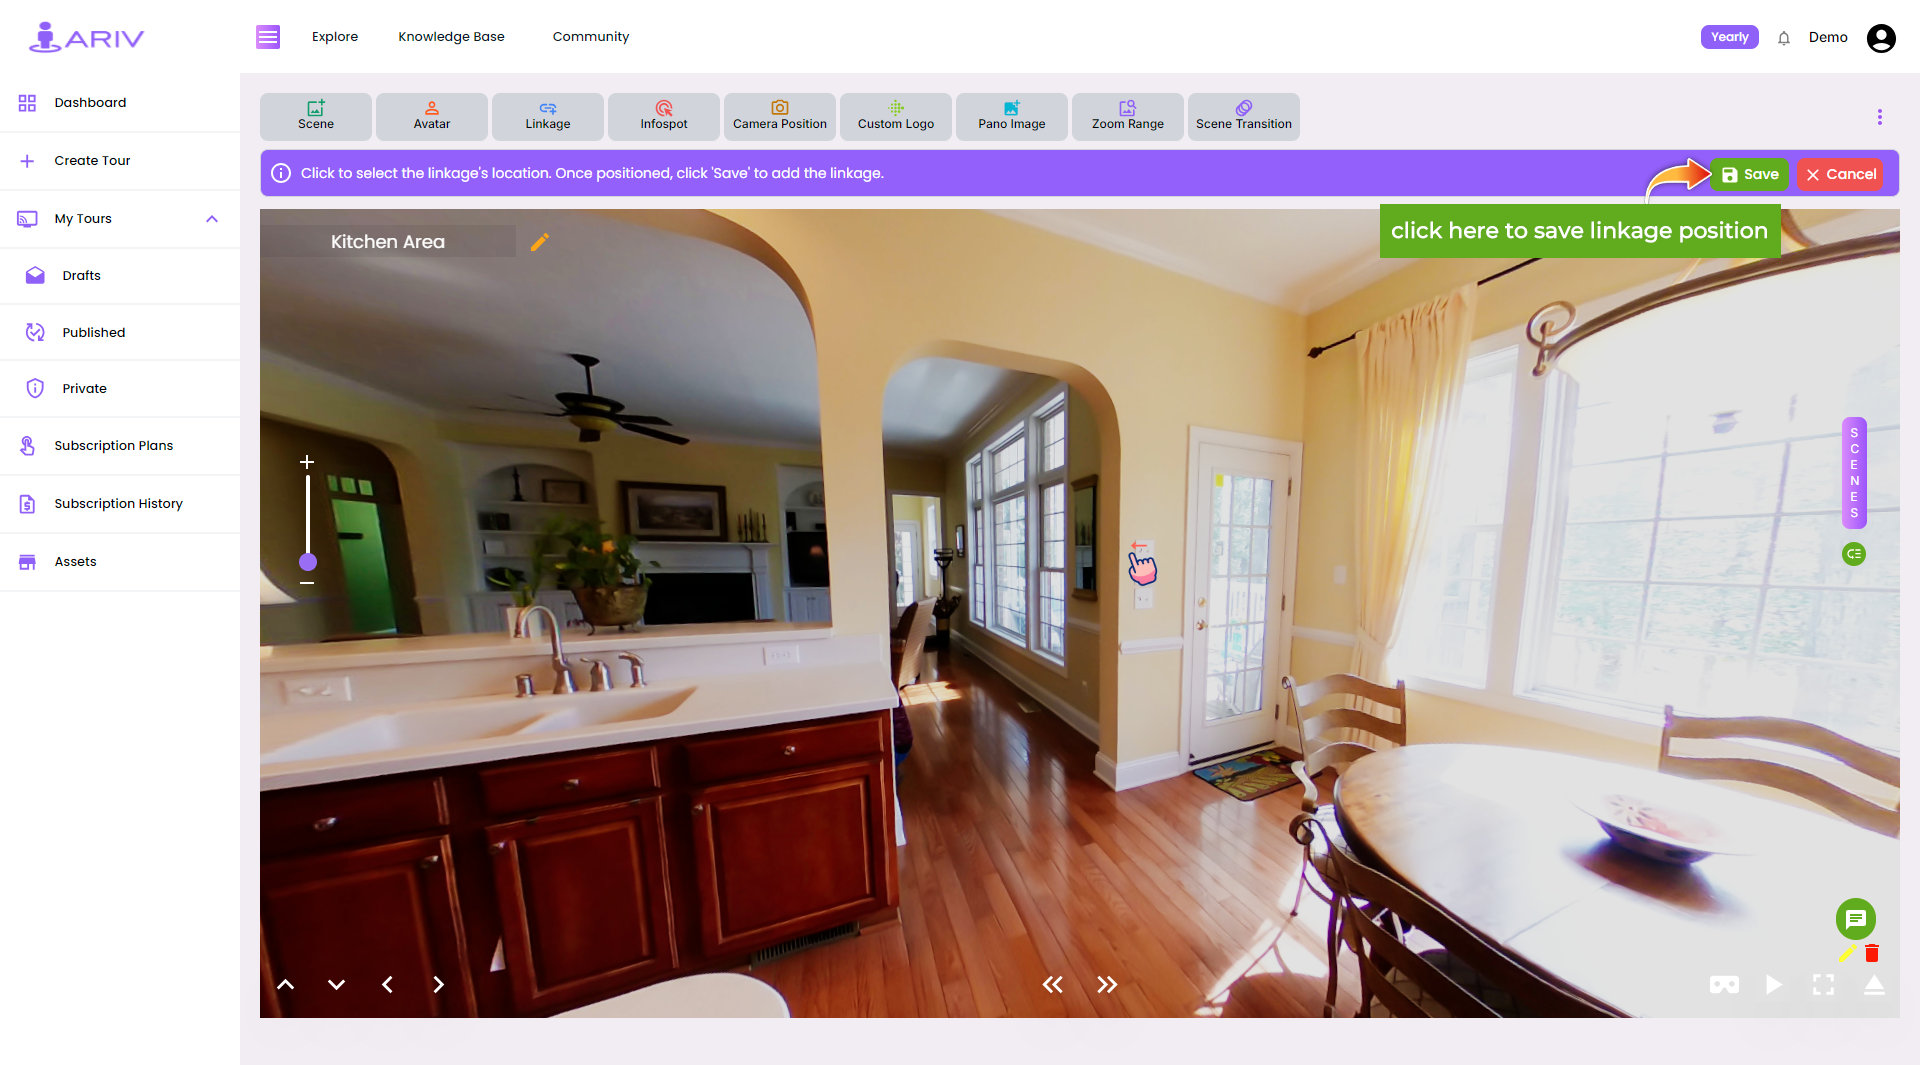
Step 6: Place the Linkage Point
- Action: Set the location of the linkage point within the starting scene.
- Instructions: Click on the specific spot in the starting scene where you want the linkage point to appear.
Step 8: Save Your Changes
- Action: Ensure your linkage is saved.
- Instructions: Click the “Save” button from the bar on the top to apply the changes to your tour.
Step 9: Preview Your Tour
- Action: Verify that the linkage works correctly.
- Instructions: Click on the three dots that appear at the top right of the Scene window and Click on Preview. Please Click on “Yes, Lets Start” You can now navigate through your tour and test the linkage points.
By following these steps, you can effectively add linkages to your 360 Tour on iAriv, enhancing the navigation experience for your viewers. If you encounter any issues or have questions, please contact our support team for assistance.