Step-by-Step Guide for Adding a Pano Image to the 360 Tour on iAriv
- Access the 360 Tour Settings:
- Open the iAriv platform and navigate to the dashboard.
- Select the 360 Tour you want to customize.
- Open the Pano Image Feature:
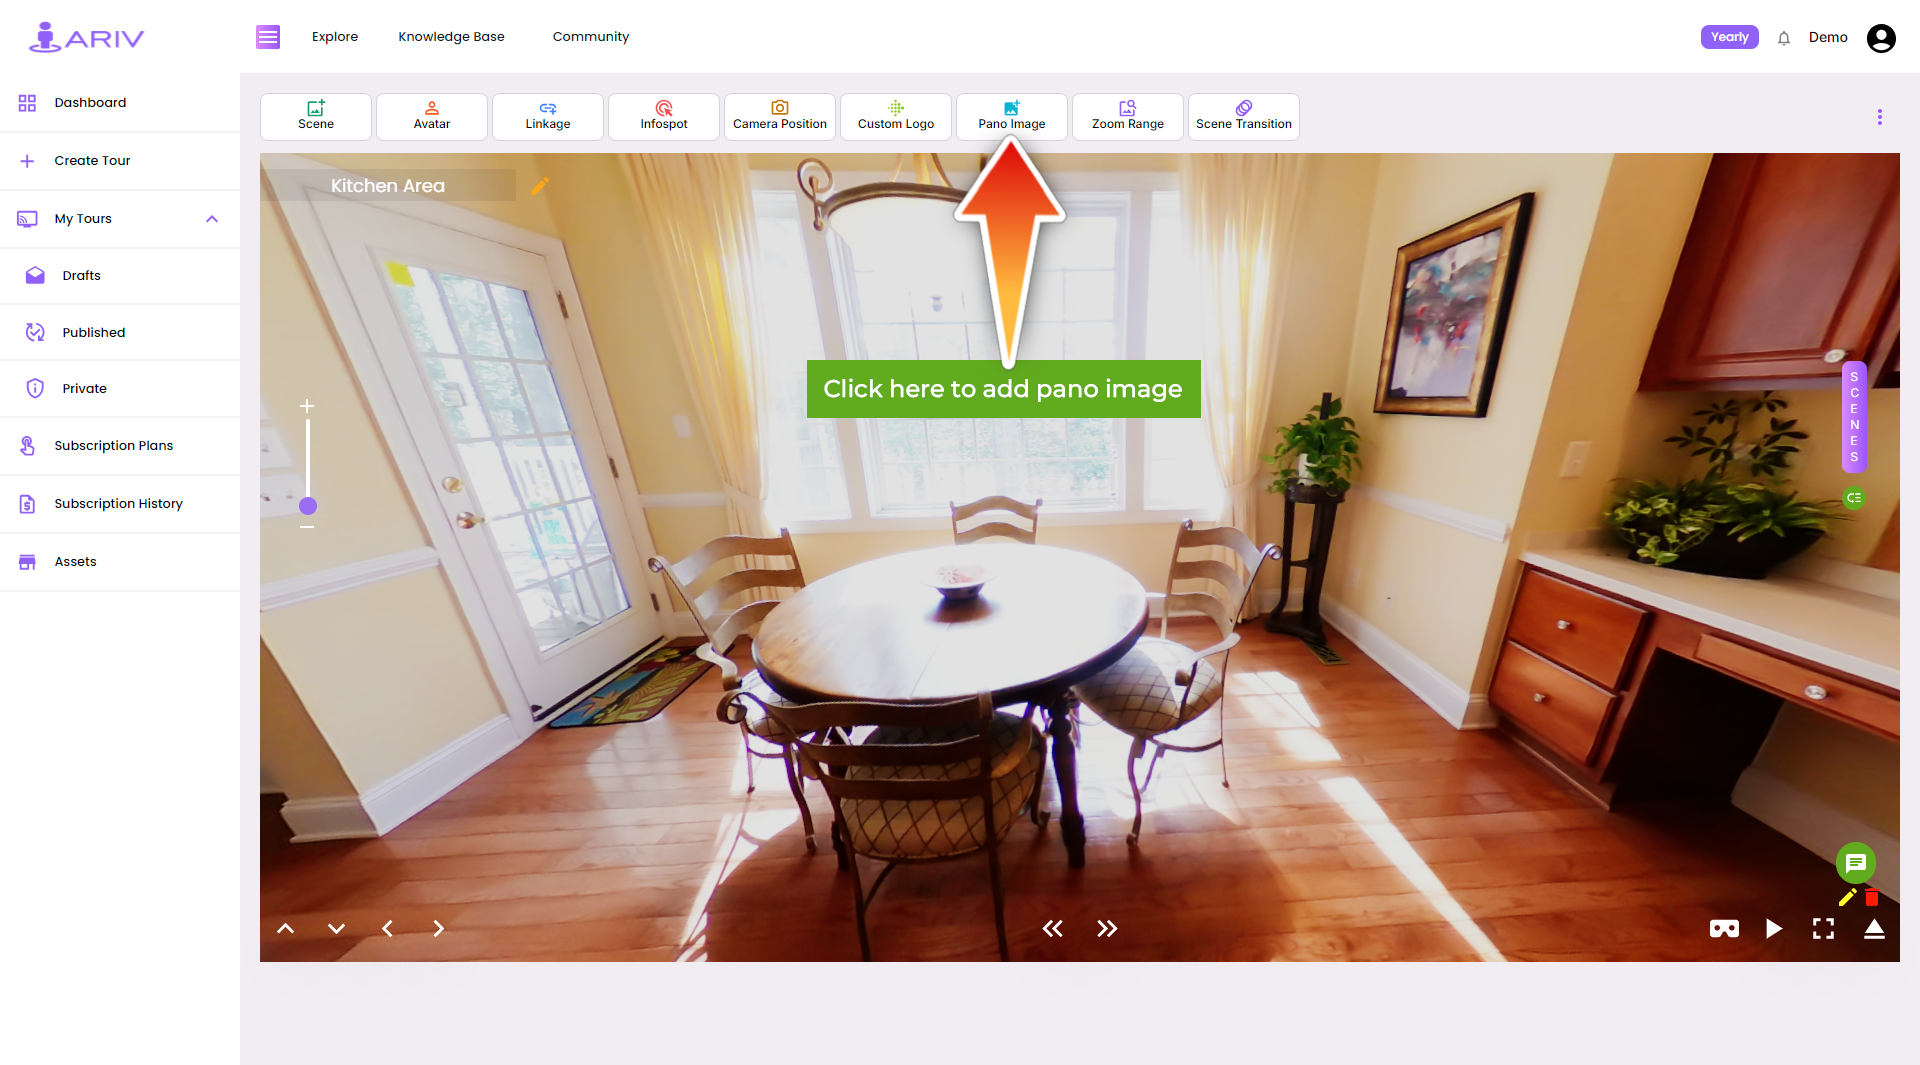
- In the 360 Tour Edit View, locate the “Add Pano Image” button.
- Click on this button to open the Pano Image dialog.
- Upload Your Pano Image:
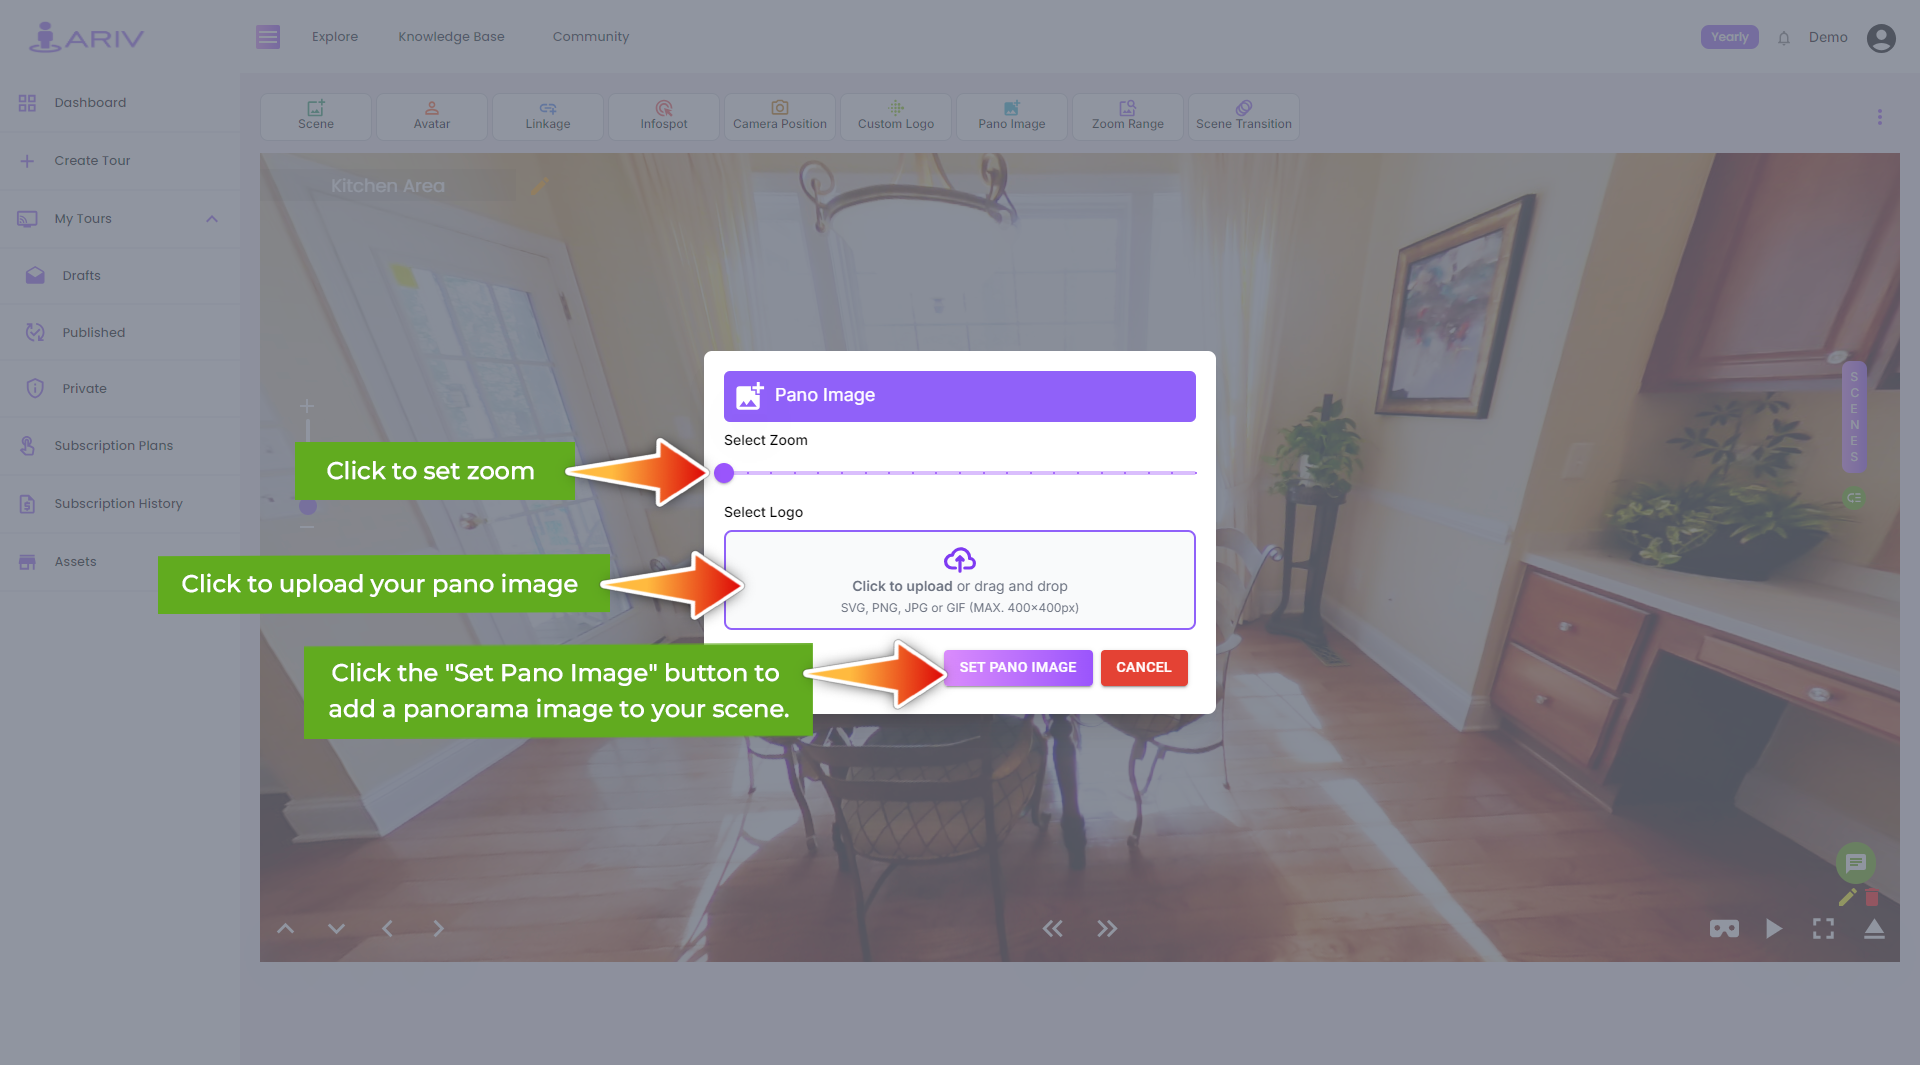
- In the Pano Logo box, click on the Upload Symbol.
- A file selection dialog will appear. Browse your computer to find the desired pano image.
- Select the pano image file and click “Open.”
- Adjust the Zoom Size:
- After uploading the image, you will have the option to adjust the zoom size.
- The zoom size determines how completely the pano image covers the 360 camera.
- The lowest zoom size is 1.0, and the highest zoom size is 3.0. Adjust the zoom to your preference.
- Set the Pano Image:
- Once you are satisfied with the uploaded image and the zoom size, click on “Set Pano Image.”
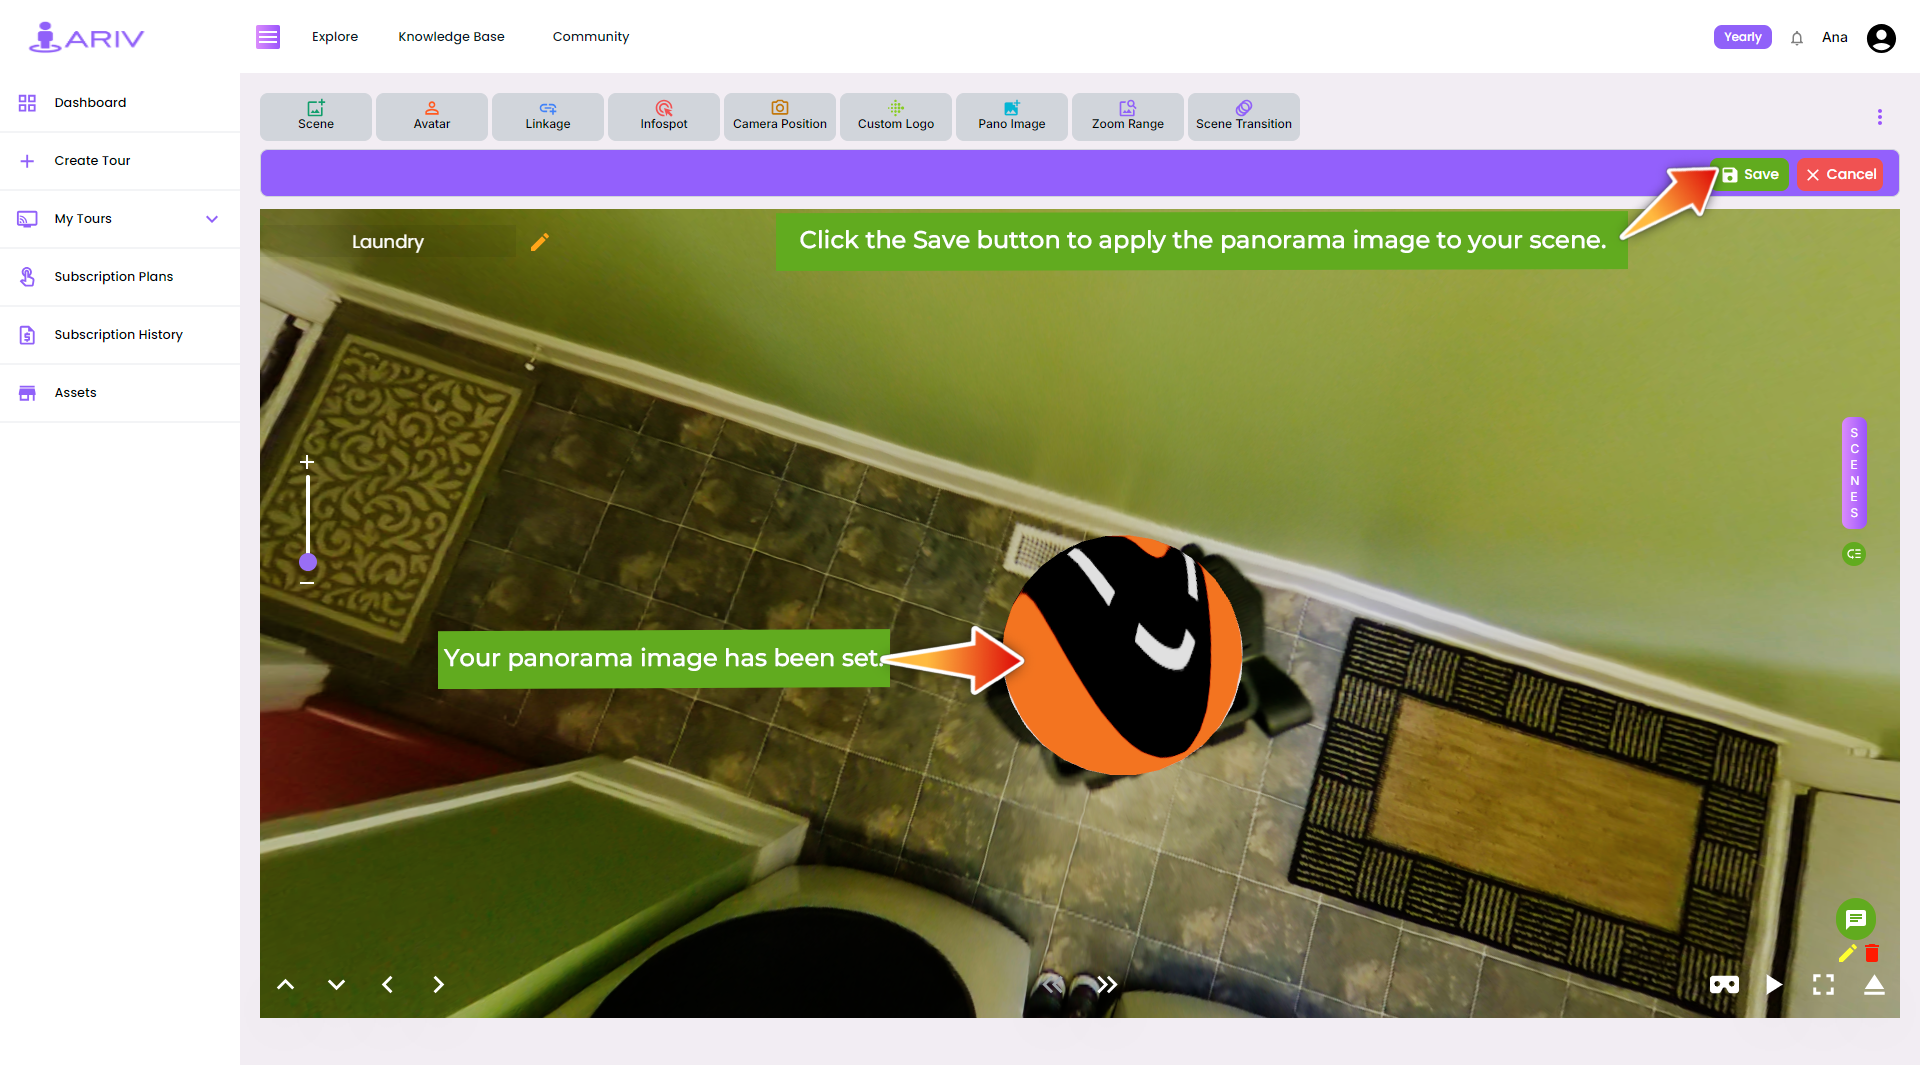
- This action will save your selected pano image and apply it to cover the 360 camera in the tour.
- Confirm the Pano Image Placement:
- Review the 360 Tour scene to ensure the pano image appears correctly on the ground at the center.
By following these steps, you can successfully add a pano image to your 360 Tour scene on iAriv, enhancing the visual experience and customizing the appearance of your tour.


