Adding custom linkage to your virtual tour allows you to create interactive elements that enhance the user experience. Follow this guide to add your own custom linkage icons to your virtual tour.
Step-by-Step Guide to Adding Custom Linkage
Step 1: Access the Tour Editor Panel
- Log In to iAriv: Open your web browser and log in to your iAriv account. How to Login into your iariv account?
- Navigate to Tour Editor: Go to the Tour Editor Panel from your dashboard to edit your virtual
tour
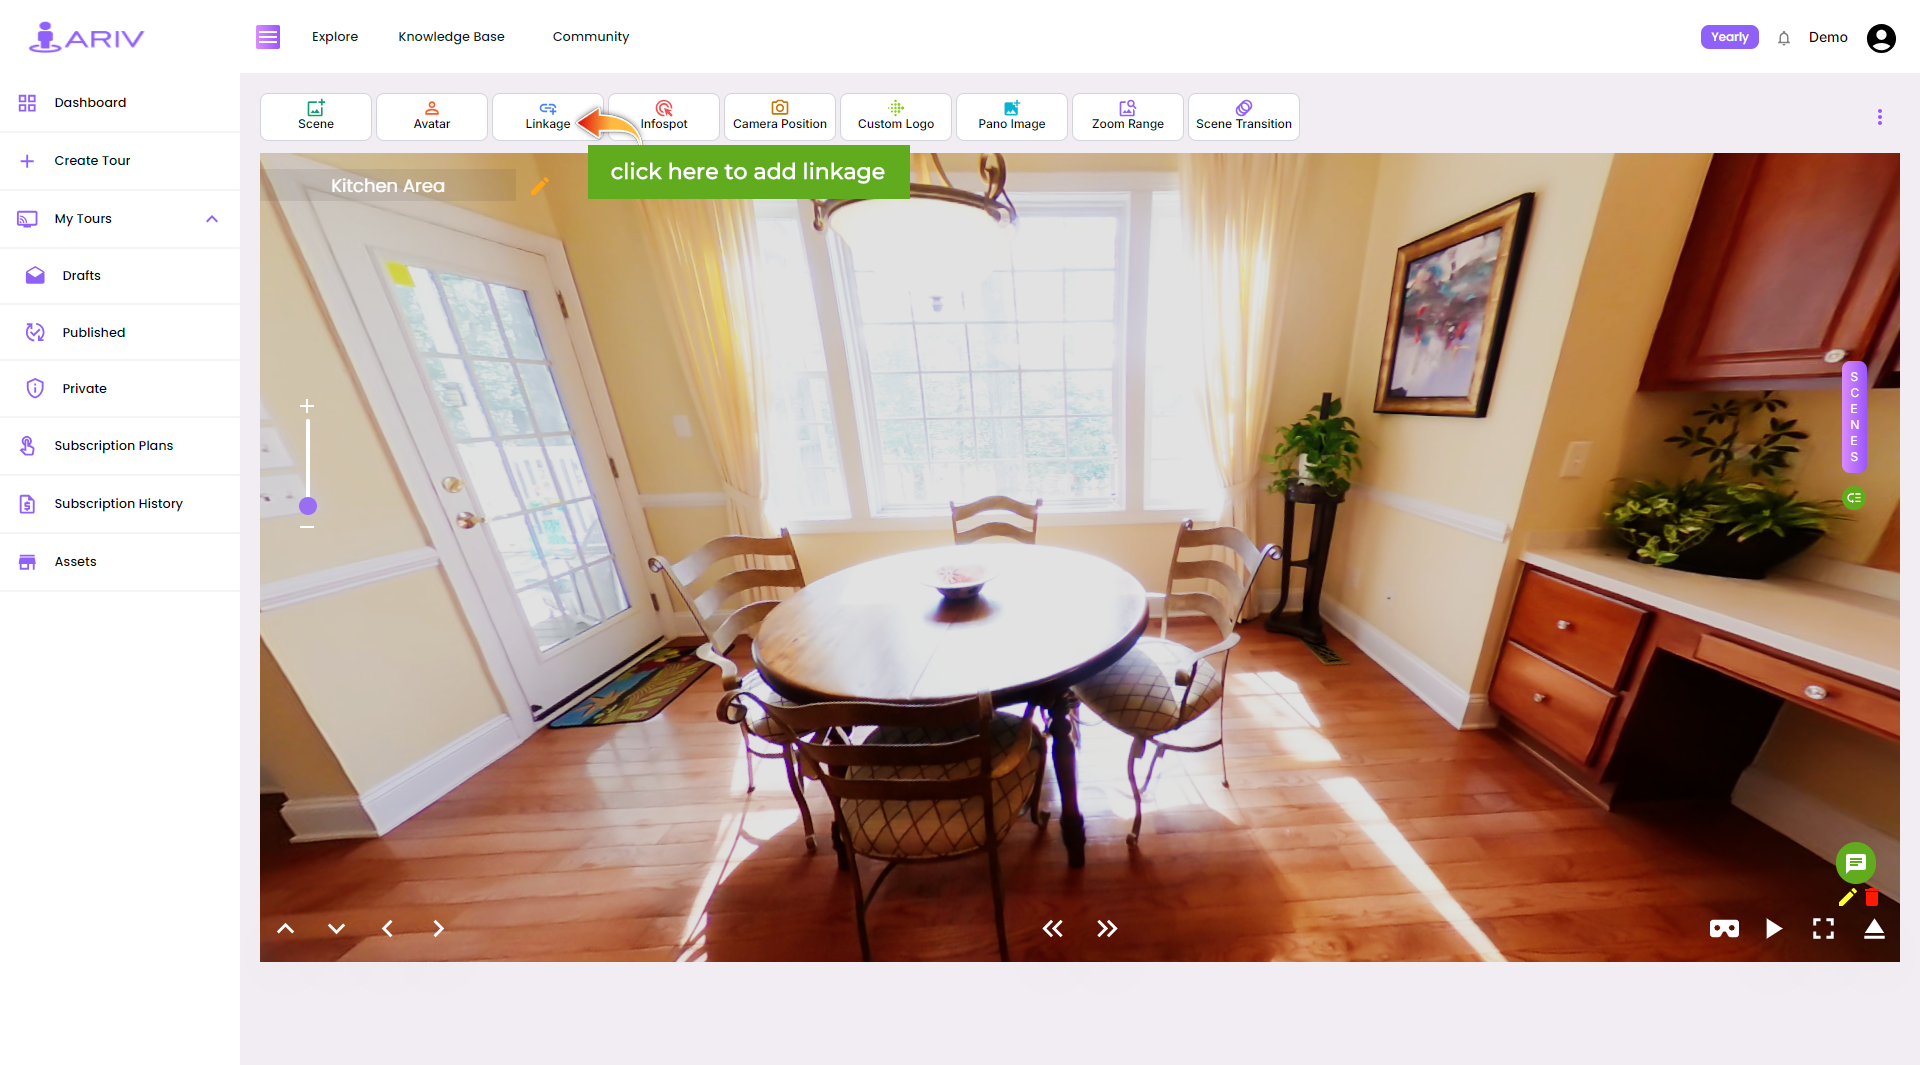
Step 2: Open Linkage Options
- Select Linkage: In the tour editor, click on the Linkage option to open the linkage settings
Step 3: Add Custom Linkage
- Initiate Custom Linkage: A pop-up will appear; click on the Linkage + button to add a new linkage.
- Select Linkage Icon: Choose your customized linkage icon from your files.
- Upload and Add Icon: Upload your selected icon and click on the Add button to integrate it into your virtual tour.
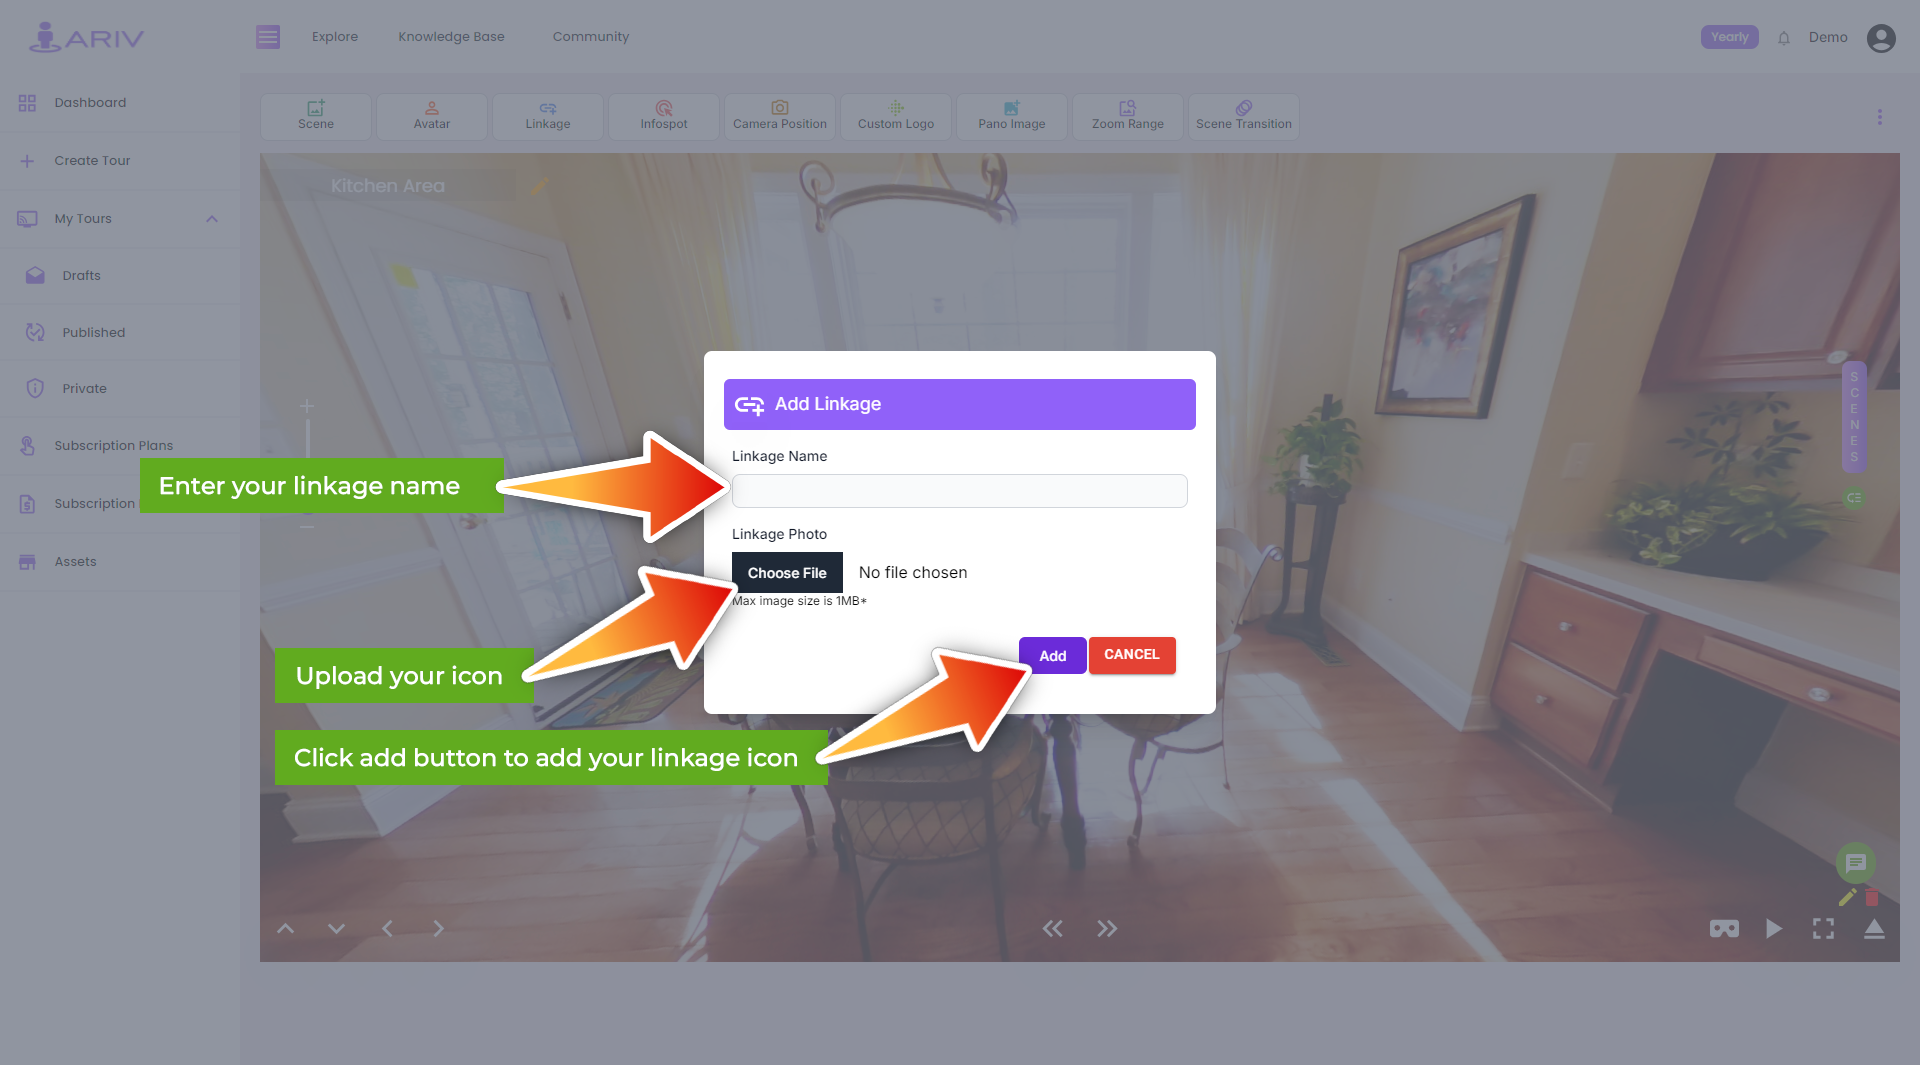
Note: The maximum file size for the linkage icon should be 1 MB. Ensure your file meets this requirement before uploading.
By following these steps, you can add custom linkage icons to your virtual tour, making it more interactive and personalized. For further assistance, please reach out to our support team.